Malware and advanced attack testing
Your CrowdStrike Falcon® trial includes access to a virtual malware lab allowing you to safely test malware samples and advanced attack techniques. This is an optional step for your evaluation, demonstrating how CrowdStrike Falcon® Prevent, our next-generation anti-virus solution, protects your environment.
WARNING: These tests include actual malware. You should NOT conduct these tests on your workstation. Testing should ONLY be done in a dedicated malware testing environment, isolated from your organization’s internal systems. The steps in this guide are written to allow testing in our virtual malware lab, hosted by CloudShare, or yours.

Estimated time
Minimum of 20 minutes depending on the
amount of testing you wish to conduct

Requirements
Windows or Mac Operating System
Google Chrome browser
See instructions for Mac >
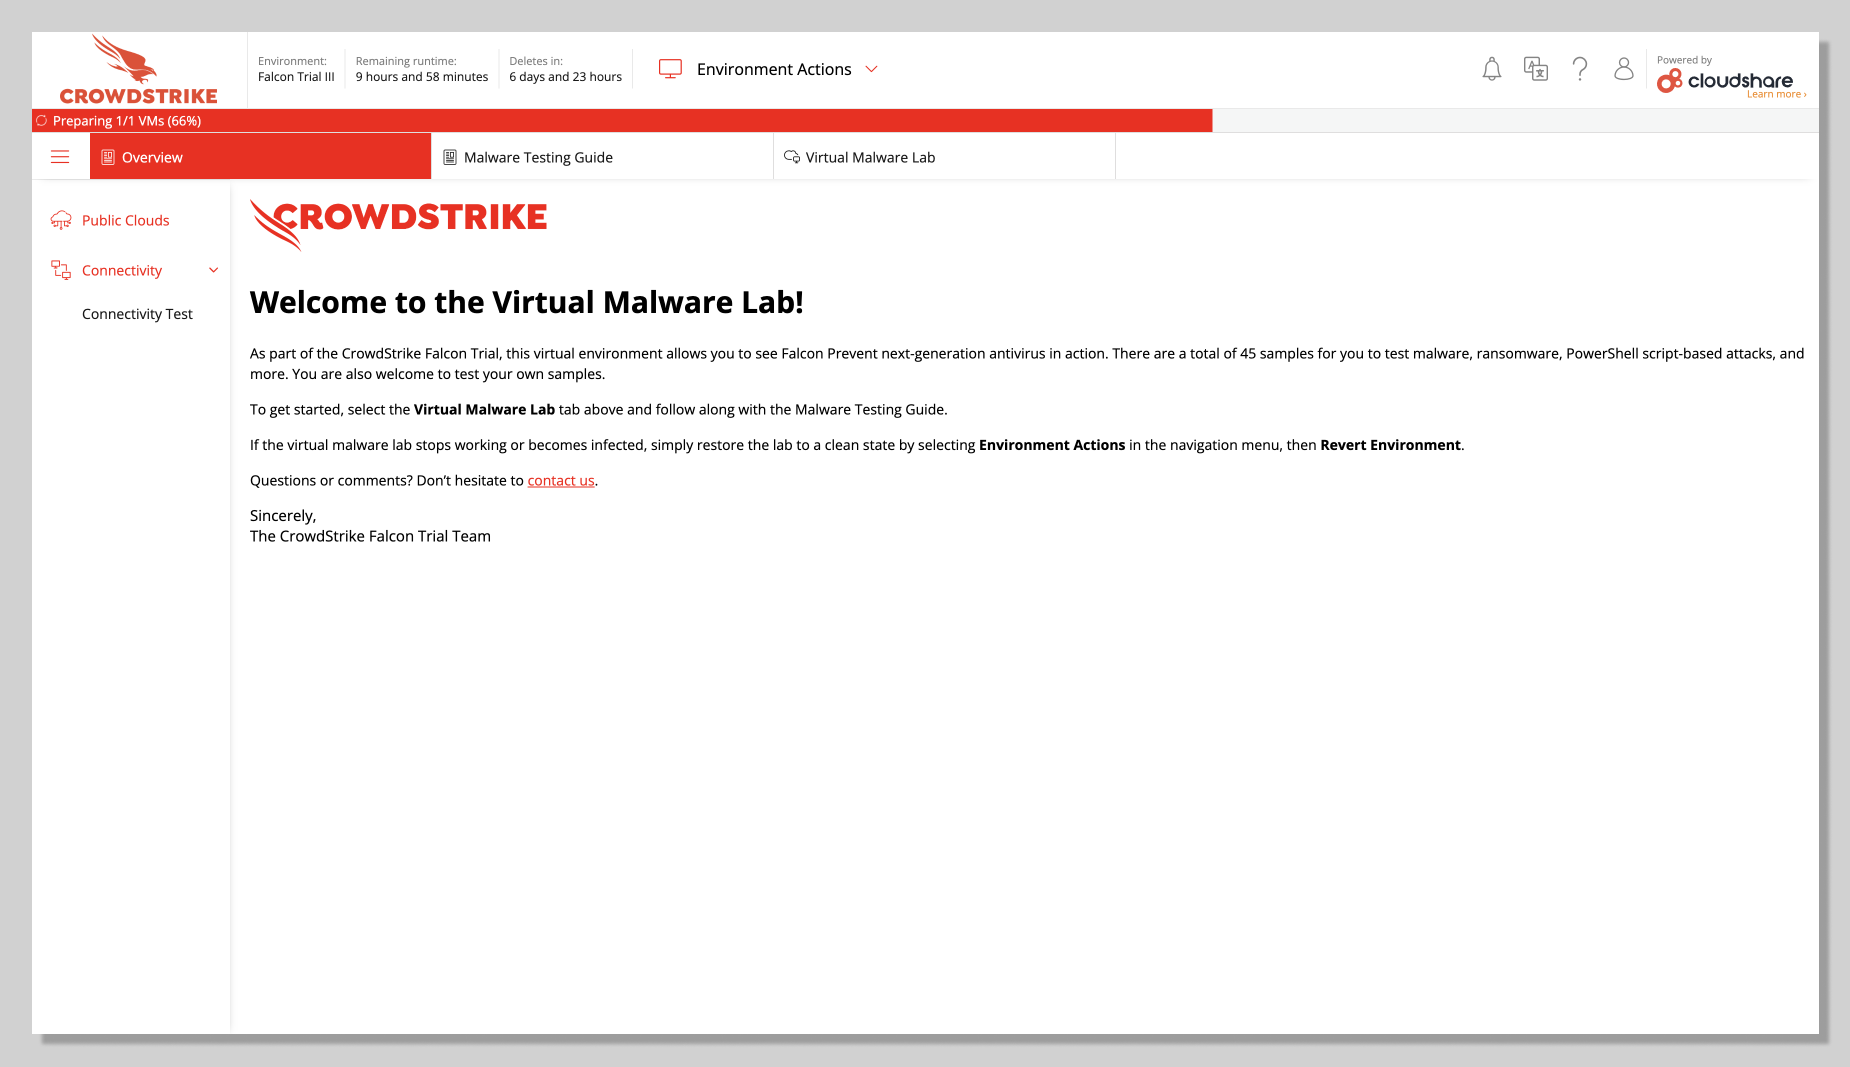
1. Accessing the virtual lab
If you already have your own malware lab setup, skip this step and proceed with step 2.
- If you have not done so, reach out to the Falcon Trial Team at FalconTrial@CrowdStrike.com to request access to the virtual malware lab. The lab is hosted by CloudShare.
- You will receive an email invitation from CloudShare. Click the link and follow the prompts to complete your registration.
- Click on the Virtual Malware Lab tab in the navigation bar to access your test machine. Your lab may take a few minutes to upload. Feel free to move to Step 2.
2. Preparing the lab
Download malware samples.
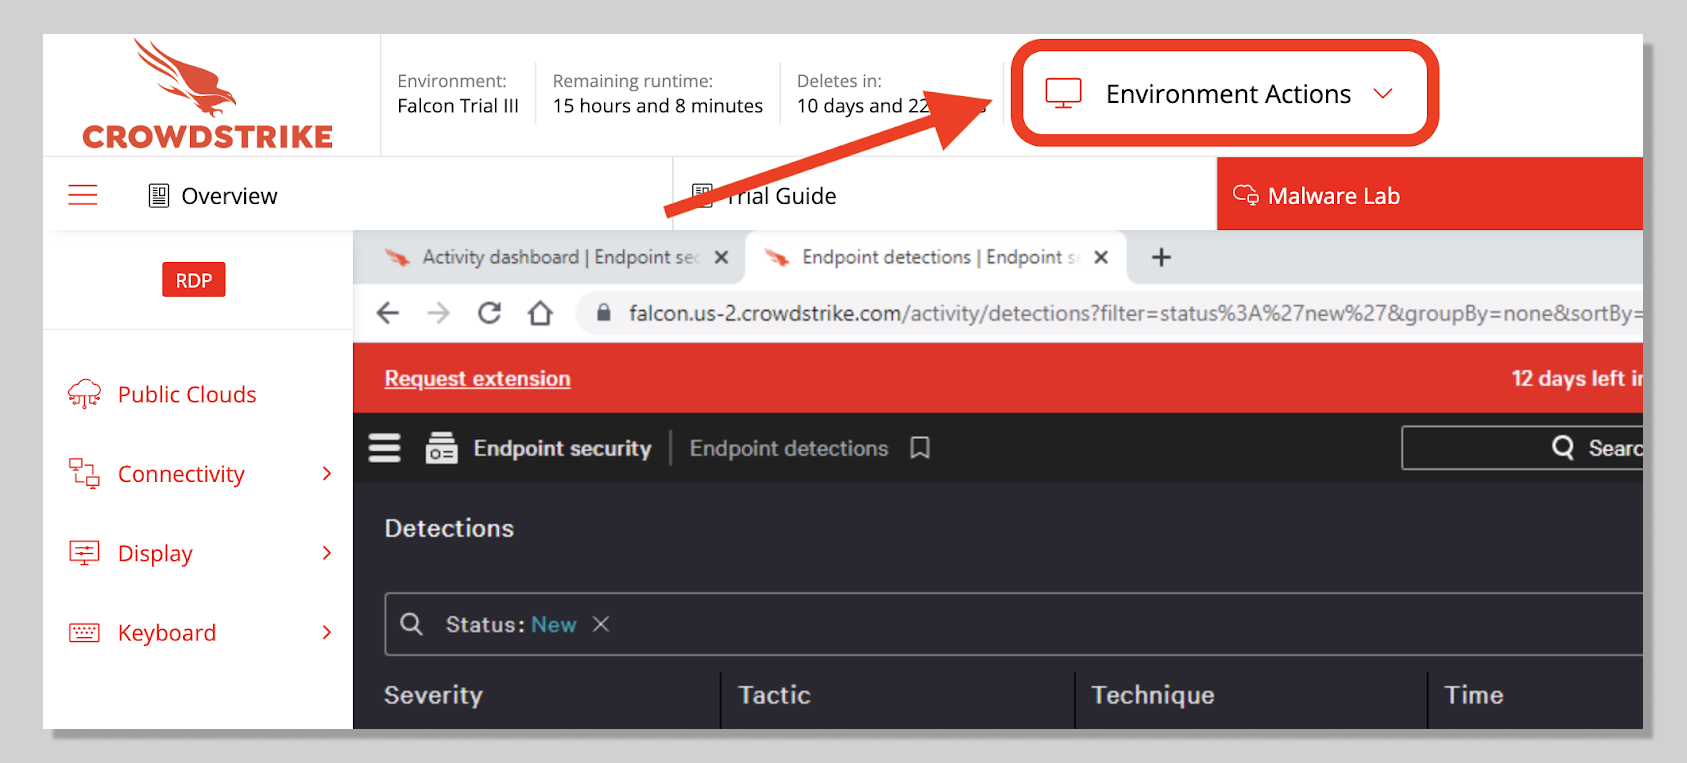
Double click Download Samples to download all files. You must Download Samples before installing the Falcon sensor. If you had previously skipped this step, revert your environment to go back to the default state.
To revert your environment:
- Select Environmental Actions > Revert environment
- A script will retrieve all samples and place them into the Sample Files folder on your desktop.
- Type any key inside the script to continue.
Deploy the Falcon sensor
After you've downloaded the samples and before you begin testing, either in your own lab or in the provided virtual environment, you’ll need to deploy sensors on each host and verify sensors are successfully installed and connected to our cloud.
Step-by-step instructions:
- Log into your trial account.
- Select the Falcon Resource Center > Essential skills > “Protect my endpoints” for your operating system. You will be guided through the sensor deployment process.
- For more help on sensor deployment: https://www.crowdstrike.com/free-trial-guide/start-and-install/

Verify active host and prevention policy
- The newly installed sensor should have a prevention policy.
- Confirm on CrowdStrike Falcon platform. Go to Host setup and management > Host management. Verify that you see your hostname CSFALCONPREVENT listed. The Prevention Policy column should show platform_default as the assigned policy.

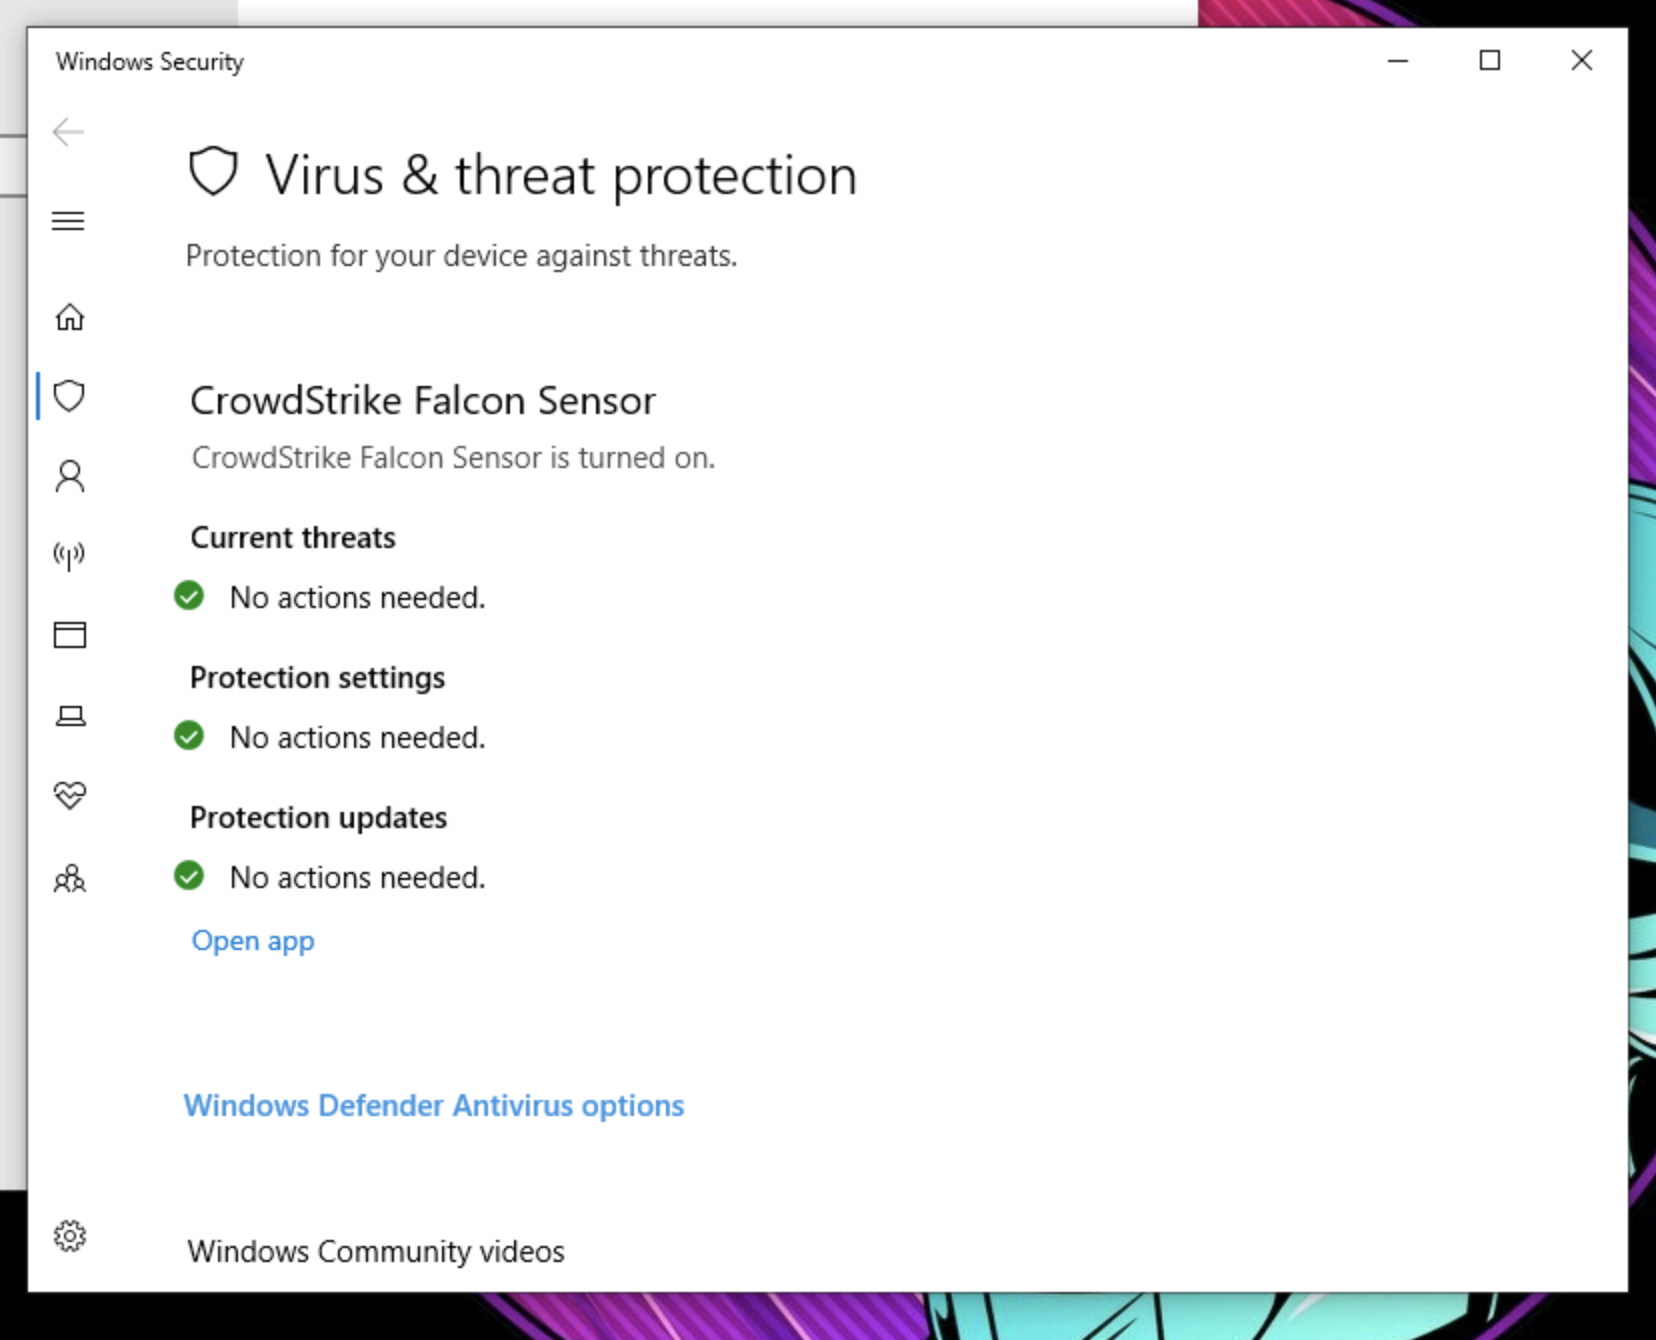
- Confirm with Windows Security. Look for CrowdStrike Falcon Sensor under Virus & threat protection.
3. Non-malicious test
- Let’s test with a non-malicious sample to ensure that the host has a working sensor under the default prevention policy.
- Double click on Sample Files , select Non-Malicious and execute cs_maltest.exe.
- With your default Windows prevention policy, you may see two messages, similar to the ones here, on the client system.
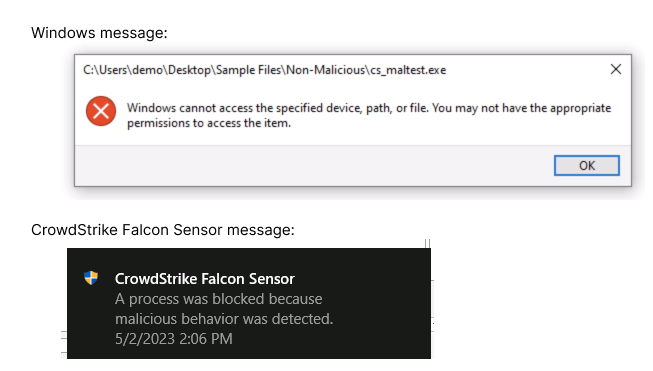
This will also generate a detection on the Falcon Platform.
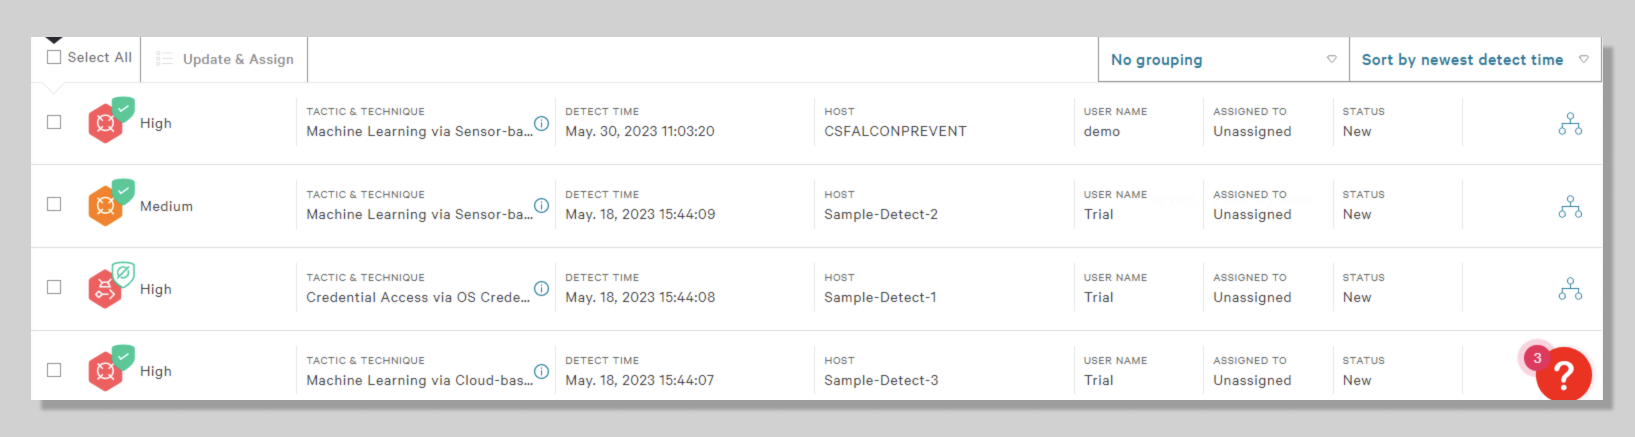
- Go to Endpoint security > Activity dashboard. The New detections card should show 4 New detections (including 3 sample detections). The Most recent detections card should also show a new High Severity detection.

- Now go to Endpoint security > Endpoint detections. You should see the High severity detection on your Host CSFALCONPREVENT.
- With each test, you will generate a new detection.
- Now that you have the sensor installed with the default prevention policy enabled, you are ready to test with live samples.
4. Malware test
Once you have the sensor installed, you can begin testing with actual malware. Malware is software that is meant to harm endpoints like computers, networks, or servers.
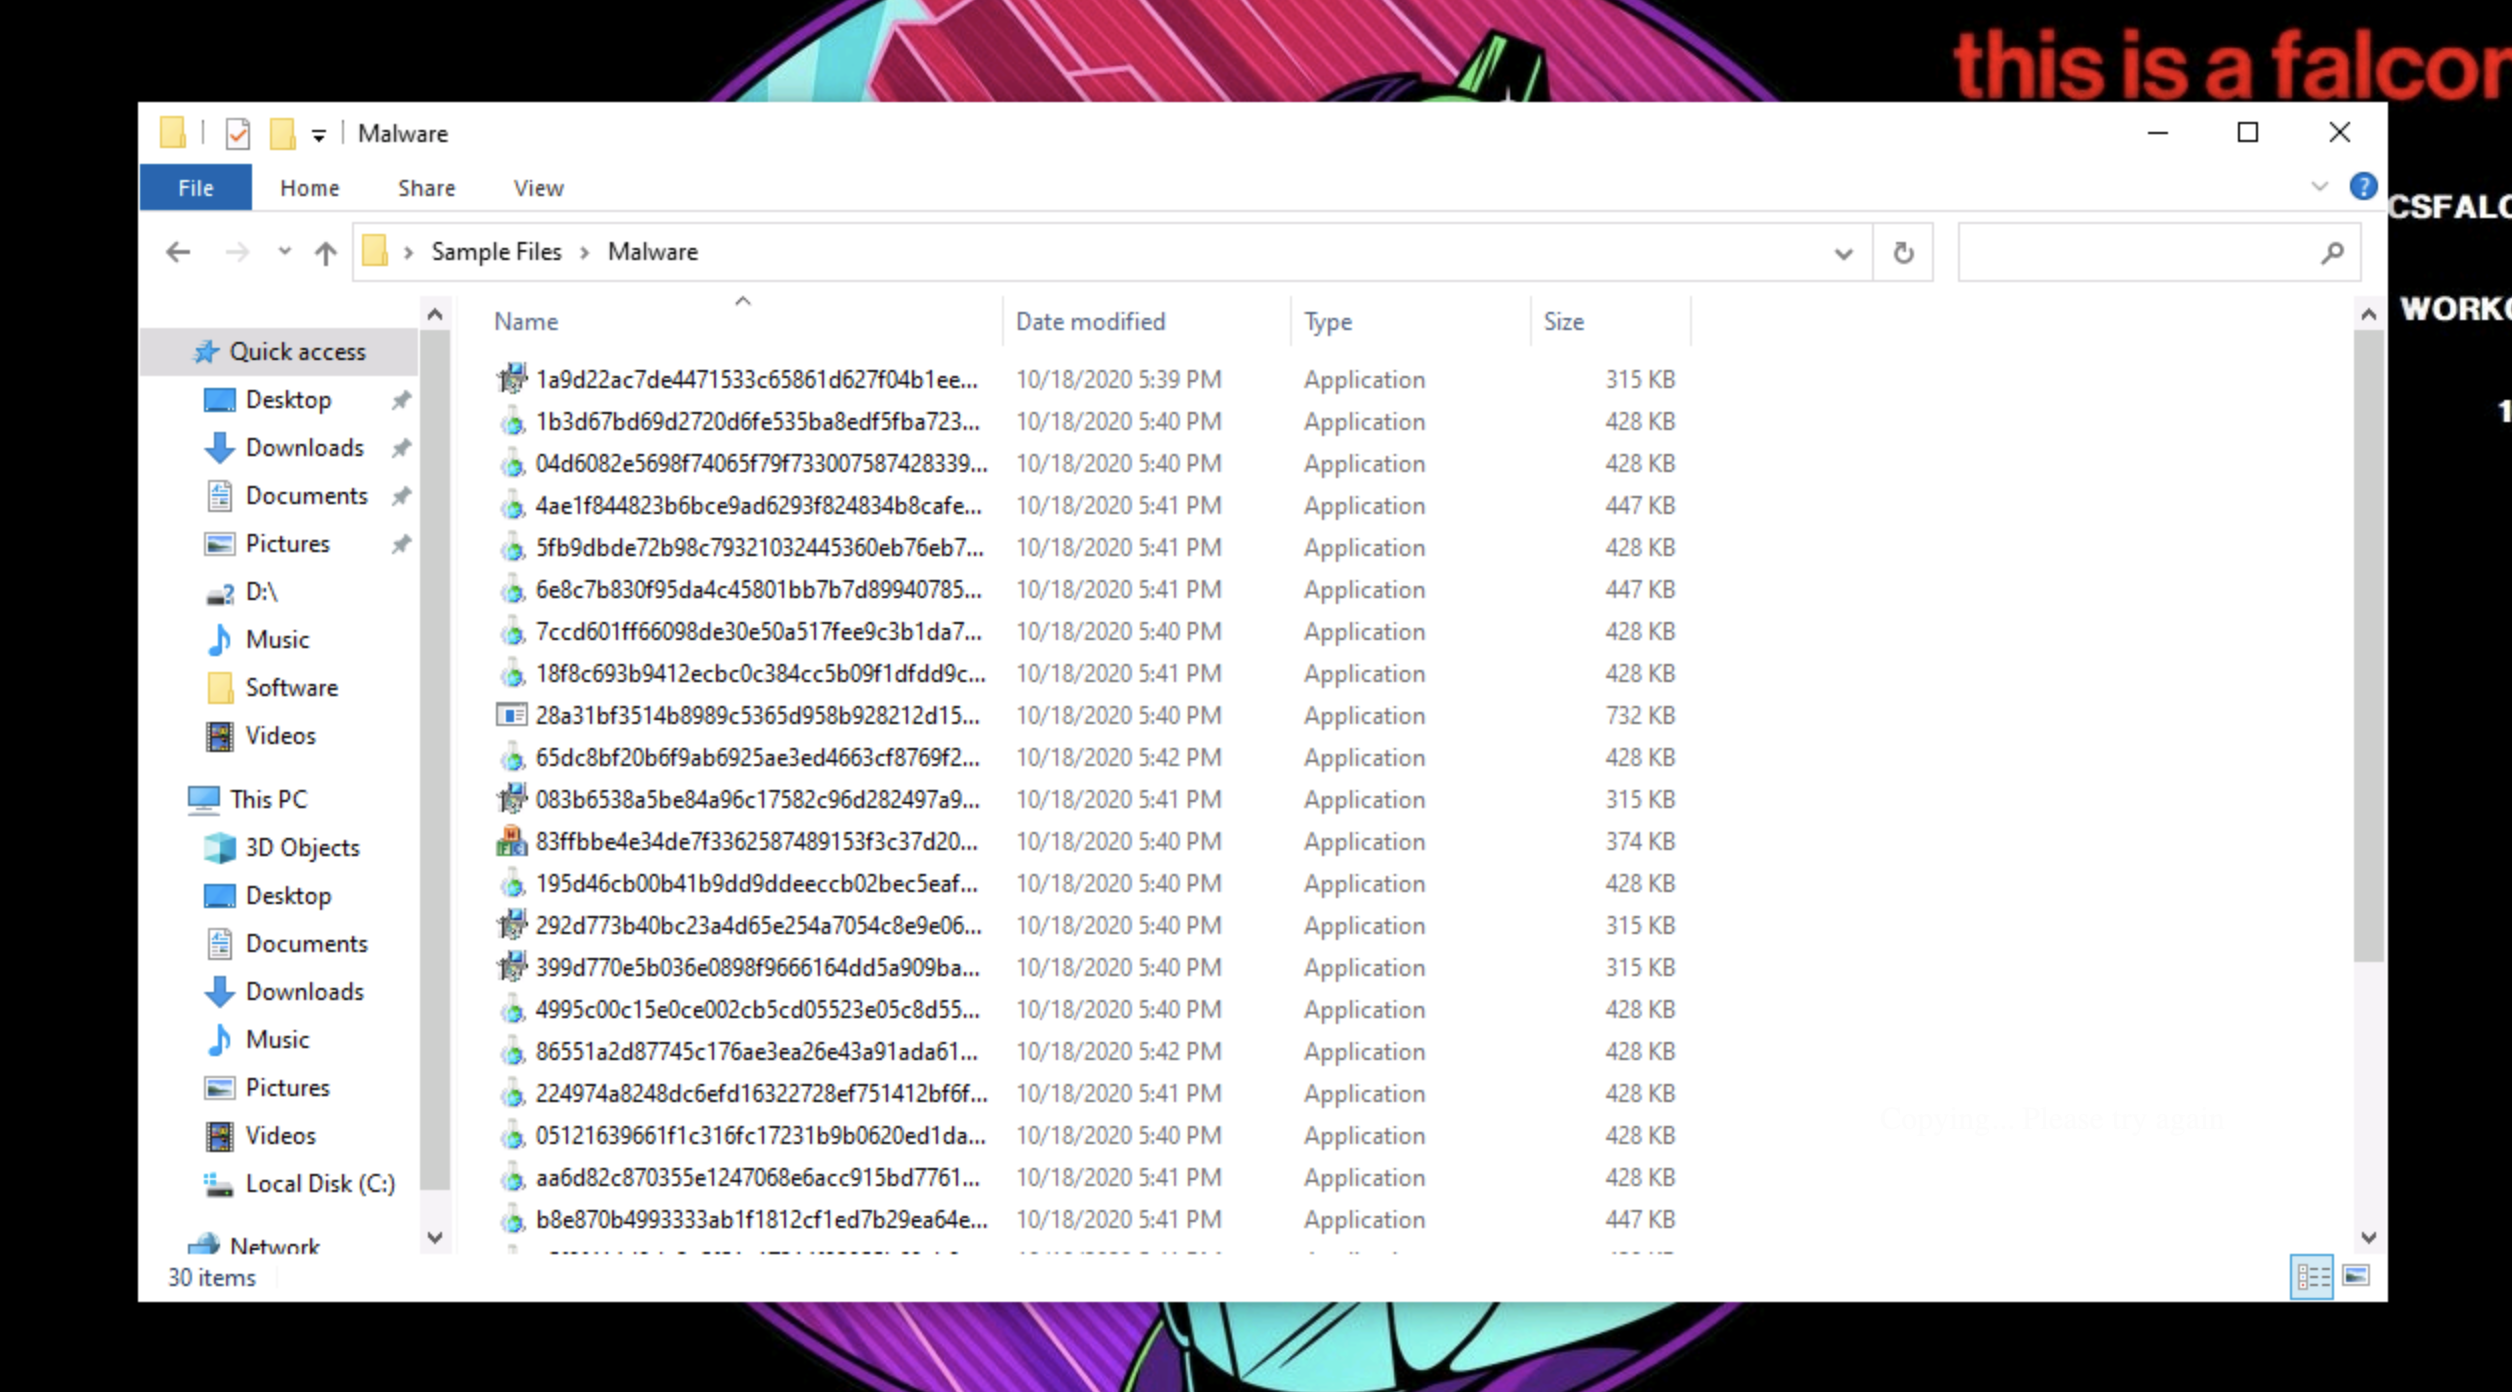
- Double click on Sample Files and select Malware to see the malware samples we have provided for you.
- Use these samples to generate detections on the Falcon platform and manage these detections on the Endpoint detections page .
- Run a malware sample from Windows Explorer.
- Double click on any of the malware samples.
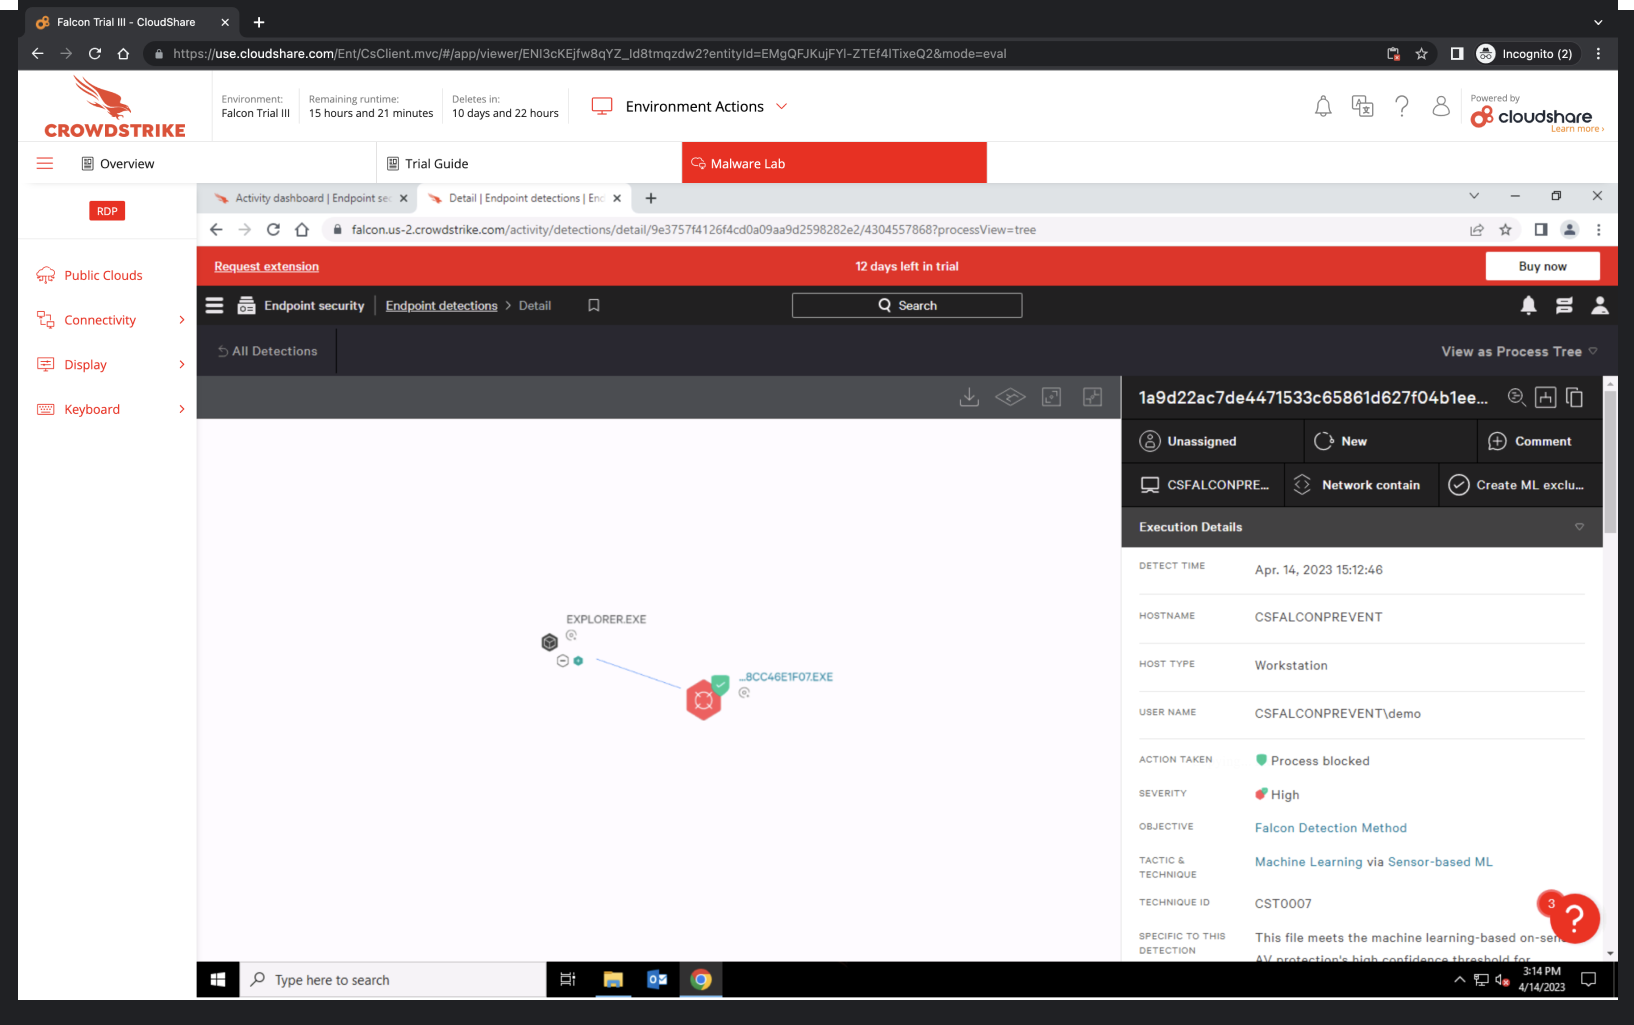
- Now navigate back to Endpoints security > Endpoint detections on the Falcon platform Click on the Full detections details icon.
- Notice that explorer.exe is the parent process.
- This helps you understand how an attack was executed.
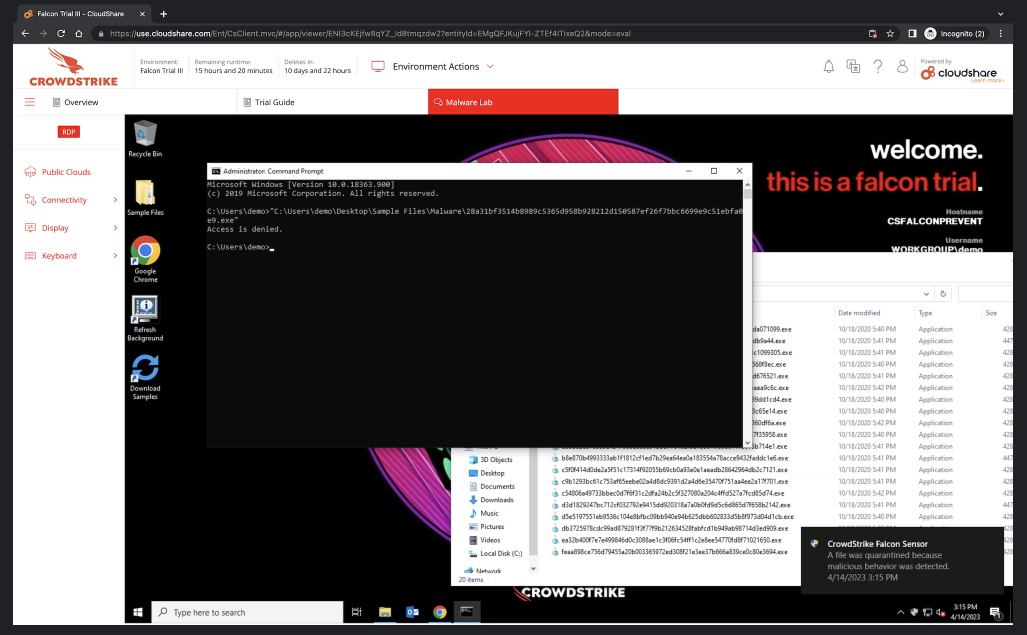
- Run a sample from a command prompt (cmd.exe).
- Open the command prompt.
- Grab a sample and upload it to the command prompt.
- Navigate to the Endpoint detections page and select the detection. Notice how the parent process for the malware is now cmd.exe.
5. Ransomware test
In recent years, ransomware has emerged as one of the most prevalent and problematic malware types.
We have collected recent samples of prominent ransomware families like Locky and WannaCry and made them available in your lab.
- Let’s start with WannaCry, the ransomware that attacked the National Health Service in 2017.
- Double click Sample Files, select Ransomware then run WannaCry. You should see both Windows and CrowdStrike Falcon Sensor notifications..
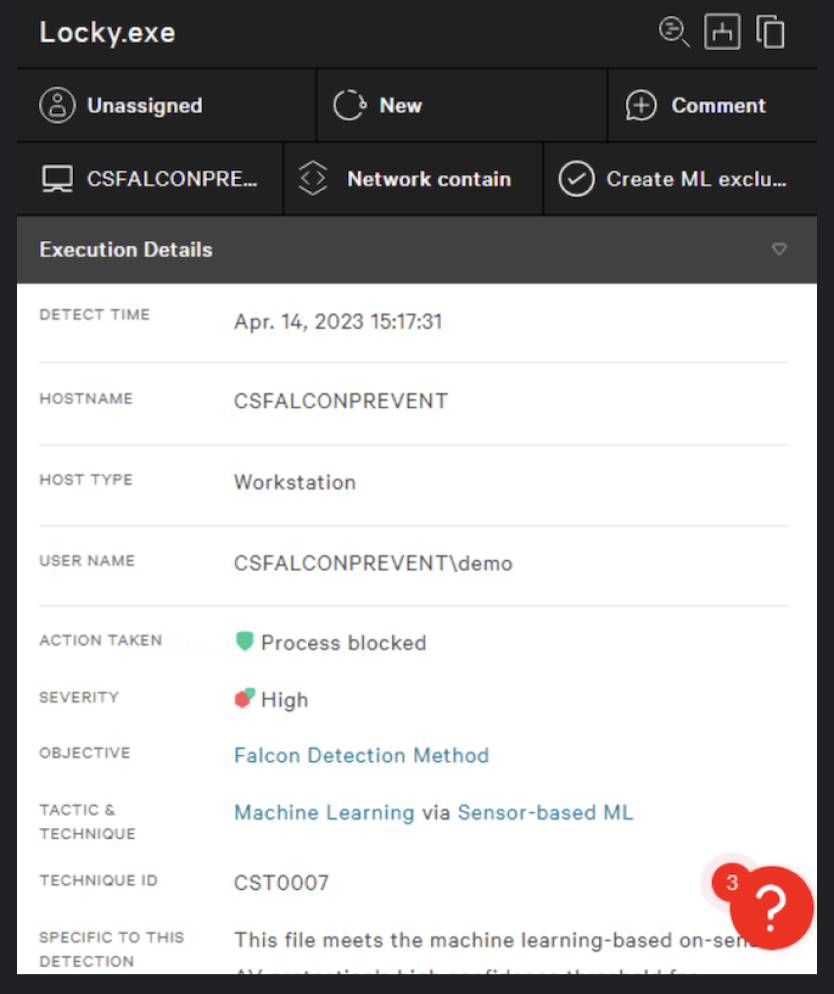
- Go back to your Ransomware samples and run Locky.
- Go to the Execution details of the Locky detection. You will be able to see the Action Taken, Tactic & Technique used and other useful information.
6. PowerShell test
Bad actors can use PowerShell maliciously to compromise your system. Let’s take a look at how Falcon uses indicators of attack (IOAs*) to identify and block malicious PowerShell scripts.
- Navigate to Desktop > Sample Files > IOAs-Behavioral.
- Double-click the Credential_Dumping.bat batch file. This script will run an encoded powershell command to capture credentials.
- Navigate to the Endpoint detections page and inspect the new detection.
- In the Execution details pane, find the Command Line detail and make sure that the toggle for Show decoded is on. We can see the full command line argument that was used. No other antivirus (AV) solution provides that level of detail. You can see how this PowerShell script would have downloaded Mimikatz.

*CrowdStrike Falcon® uses an Indicator of Attack or IOA, to represent a series of actions that an attacker must conduct during a successful attack. IOAs are concerned with the execution of these steps, the intent of the adversary, and the outcomes that adversary is trying to achieve. This allows Falcon to identify and block new and unknown threats based on the tactics, techniques, and procedures used by the attacker.
7. Persistence test
Persistence is when a bad actor maintains an undetected presence in a network for a prolonged period of time with the intention to steal information. Let’s take a look at how Falcon uses IOAs* to identify and block bad actors’ attempts to remain hidden.
- Navigate to Desktop > Sample Files > IOAs-Behavioral.
- Double-click the Sticky_Keys.bat batch file.
- The file will run in a command prompt window.
- It will secretly modify a registry key that would allow an attacker to login to the machine without ever having to provide a username or password.
- Use the virtual lab Keyboard and select the “send ctrl+alt+delete” button to bring up the Windows lock screen.
- Click on the Ease of Access option in the lower left hand corner and on the screen that pops up.
- Check the box for Type without the keyboard (On-Screen Keyboard) then hit Apply.
Without Falcon, a command prompt would have appeared, giving the attacker full system access (NT AUTHORITY\SYSTEM). This is an example of attacker behavior that does not use malware and is commonly missed by legacy AV solutions. Falcon stopped this persistence mechanism even though no malware was used.
- You will find a new, critical alert under Most recent detections on your Activity dashboard and on your Endpoint detections page.
- Exit the Windows lock screen and switch back to the Falcon platform.
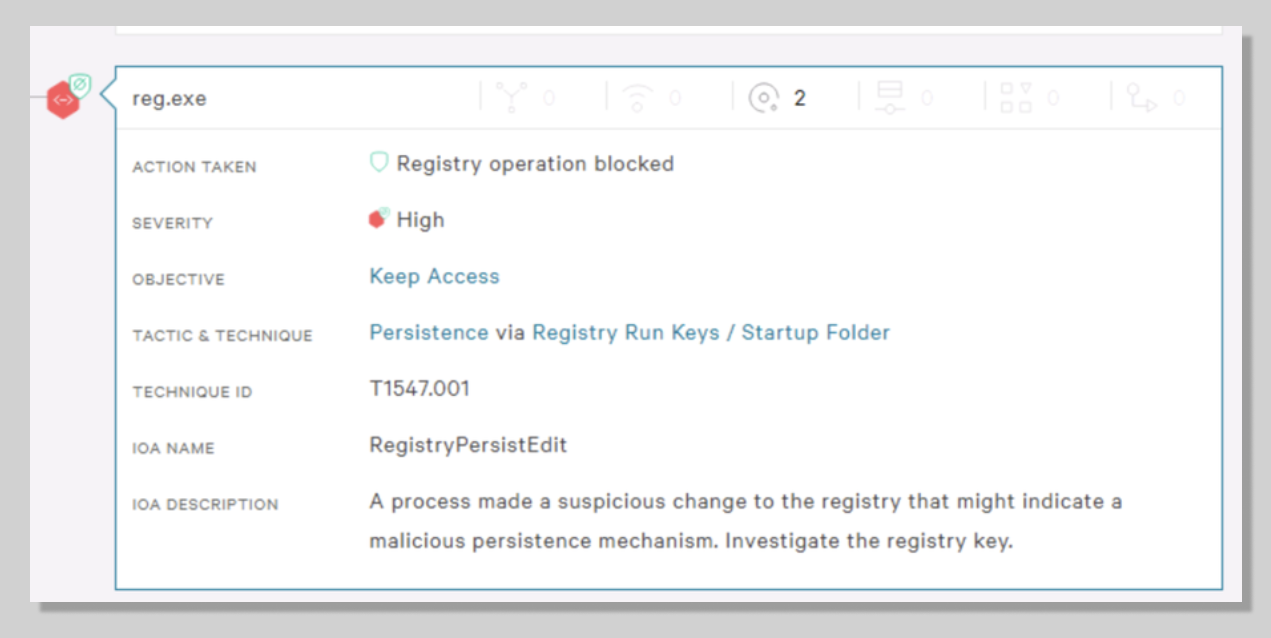
- By expanding the new alert on the Endpoint detections page, we can see reg.exe was blocked and how the Tactic & Technique is Persistence. See how the IOA Description recommends that you investigate the registry key.
Note: In both of these examples, no malware was used. These are examples of file-less attacks. Falcon identified a behavior that was suspicious and protected the user. This is an example of the power of IOAs. IOAs identify malicious behavior – no matter how it is delivered.
8. Phishing attack test
Phishing attacks are a scam where the bad actor impersonates a person or organization to steal information.
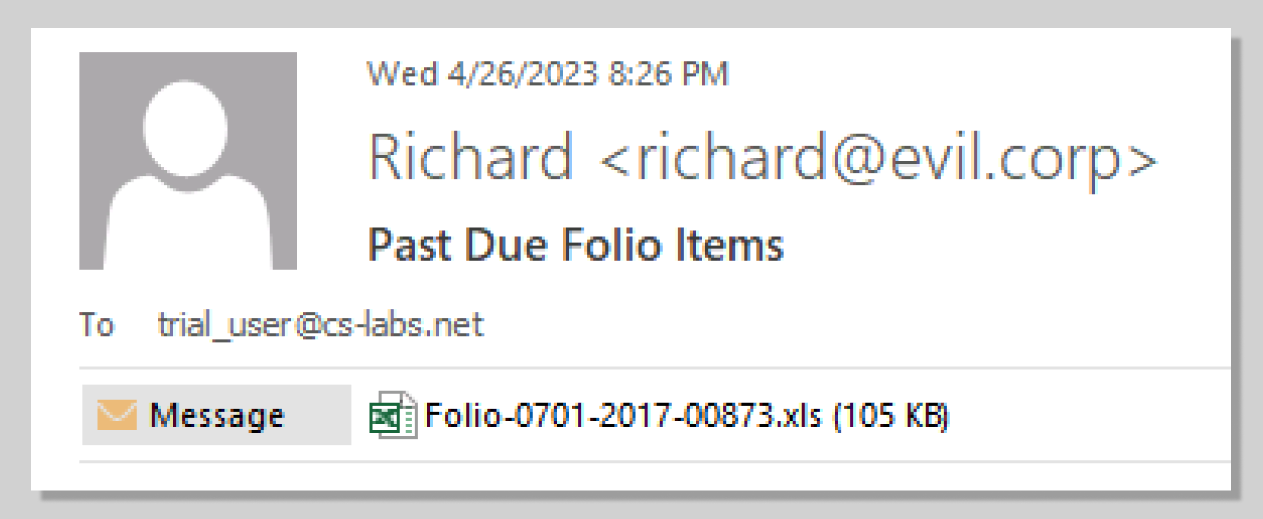
- In this scenario we will simulate a phishing attack by opening an email with a malicious attachment.
- In the virtual malware lab, open Outlook and go to the Inbox. You can Cancel the Activation Wizard messages. Open the email from Richard. This phishing attack claims that the user has unpaid charges from a hotel stay.
- Double-click Folio-0701-2017-00873.xls. You’ll have the option to Open, Save, or Cancel the download. For this example, Open the file.
- After you open the attached Excel file, the Microsoft Visual Basic error and CrowdStrike Falcon messages appear.
- This indicates that Falcon has stopped the document from executing its malicious payload in the background.
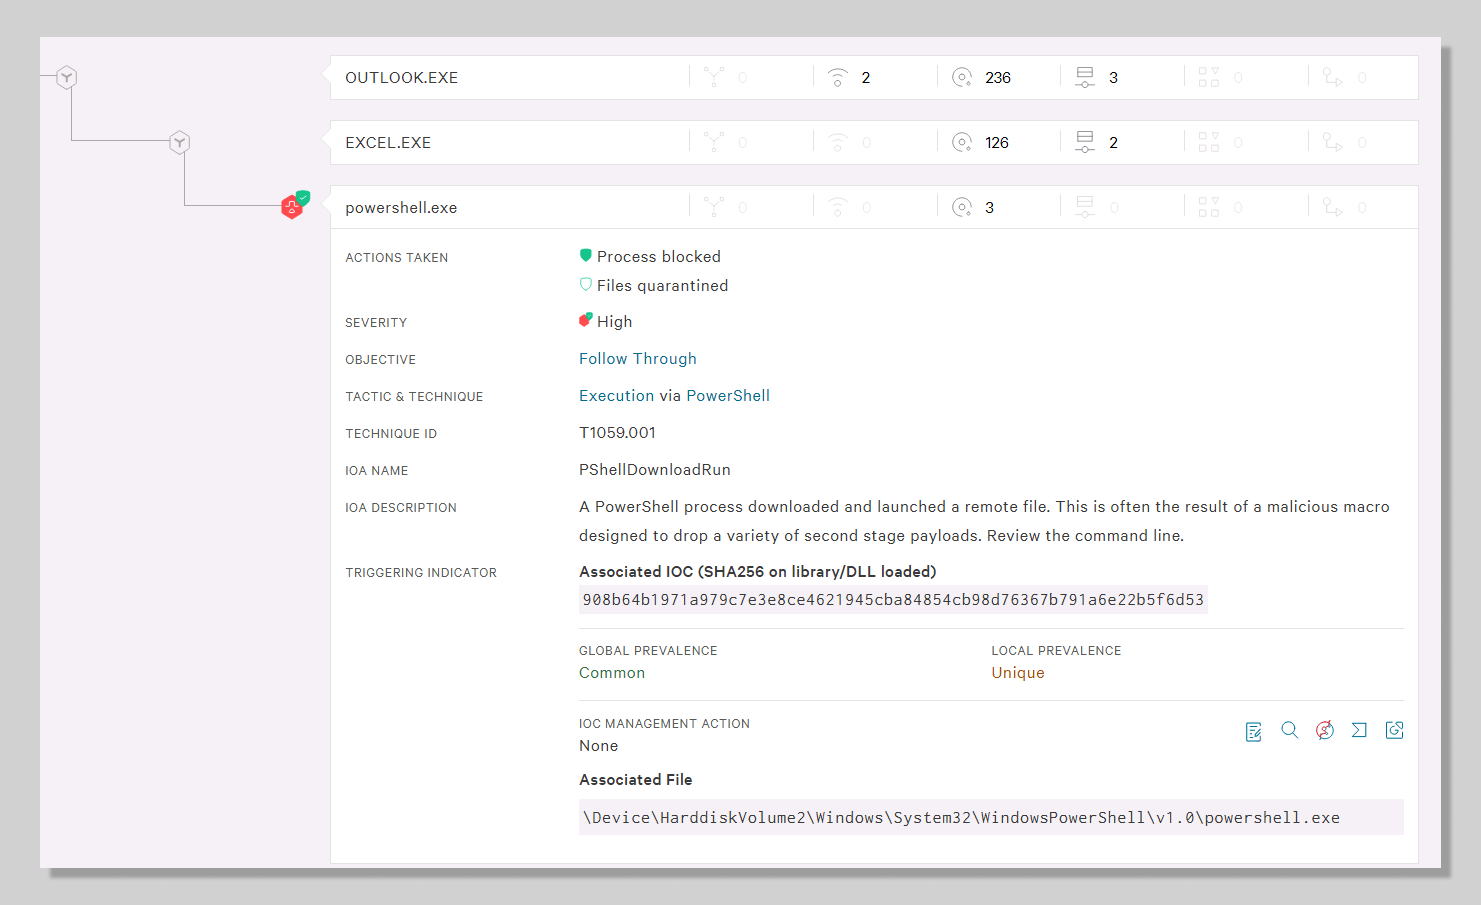
- Opening the attachment triggered a new alert in the Falcon platform.
- Expanding the new alert on the Endpoint detections page clearly illustrates that this threat came from Outlook.exe and that the Excel attachment launched PowerShell.
- To get even more details as to what PowerShell did, go to Execution details > Command Line. You can see that PowerShell attempted to run a hidden command and download the malicious script from Github.
- Managing your hash policy can be done directly from a detection.
- This means, if a detection is created for a malicious file, it can immediately be added to the blacklist using the Execution Details pane on the right of the selected alert.
- Simply click the Update Hash Policy button for the selected hash and make changes. The same is true if a custom application is causing false alerts and needs to be added to the whitelist.
9. Application Management test
Falcon allows you to manually block or allow applications based on your organization’s unique needs.
- Run an application.
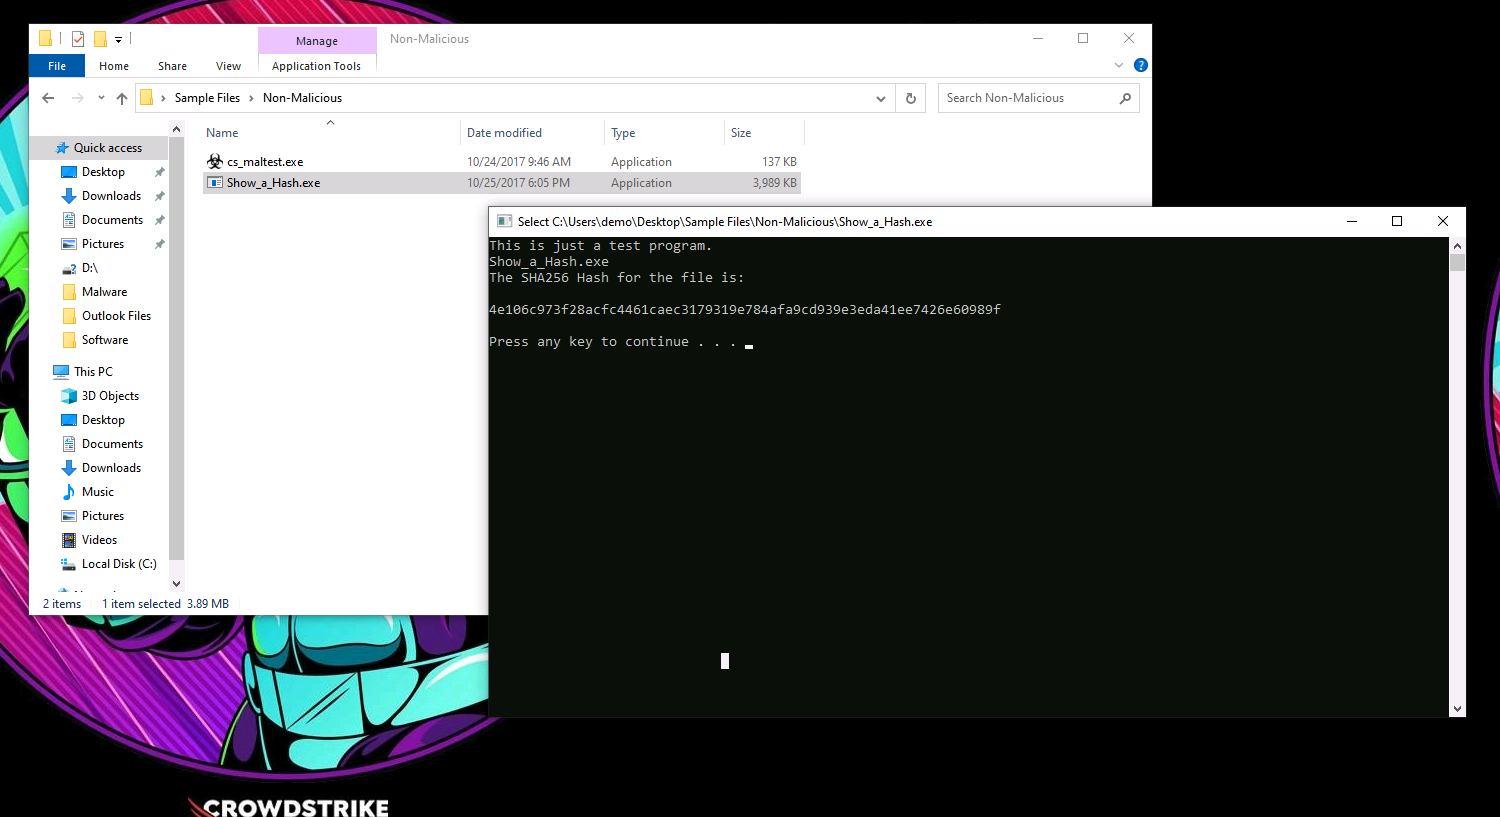
- Navigate to Desktop > Sample Files > Non-Malicious.
- Double-click and run the Show_a_Hash.exe application. (This application does nothing more than show its own file hash in a command prompt.)
- We will use that hash to blacklist the file and prevent it from running again.
- Copy the hash from the Command Prompt or from here:
4e106c973f28acfc4461caec3179319e784afa9cd939e3eda41ee7426e60989f
Manually add IOC
- Go to Endpoint security > IOC Management.
- Click on Add indicators > Add hashes.
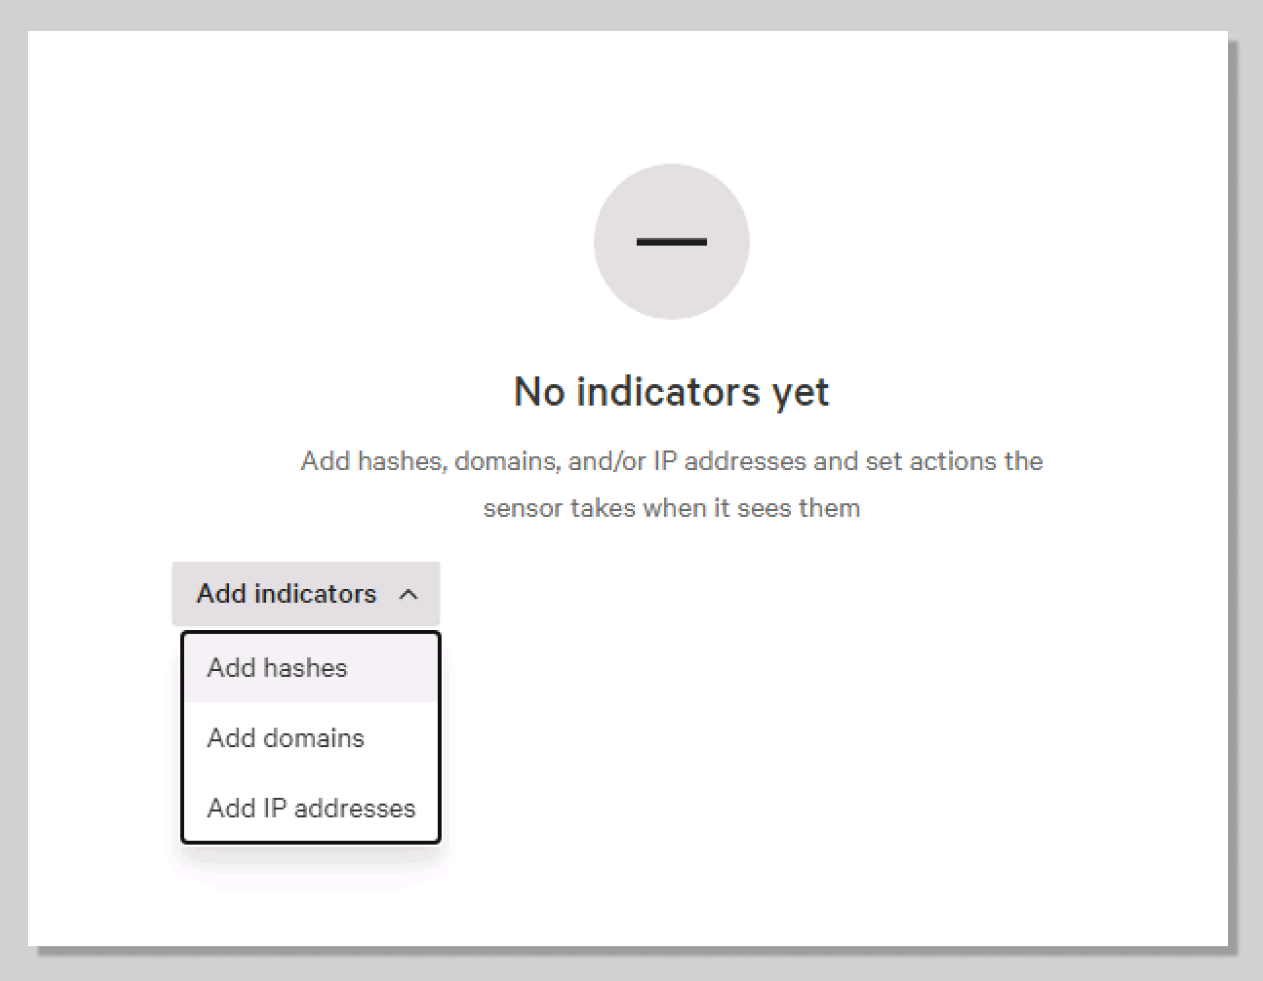
Manually add hashes
- Paste the copied hash into the box.
- Check All hosts and select the following: Platform > Windows ; Action > Block Block and show as detection ; Severity > Critical.
- Finish by clicking on Add hashes.
- Re-run the application.
- Navigate back to the Desktop (close the command prompt window), then double-click Show_a_Hash.exe again and notice that it does not run this time.
- In the Falcon platform, navigate to Endpoint detections and inspect the new alert.
- Managing your hash policy can be done directly from a detection. This means, if a detection is created for a malicious file, it can immediately be added to the blacklist using the Execution Details pane on the right of the selected alert.
- Simply click the Update Hash Policy button for the selected hash and make changes. The same is true if a custom application is causing false alerts and needs to be added to the whitelist.

TAKE-AWAYS: We saw that Falcon can protect users from all types of attacks; from the commodity malware attack to more complex phishing. We have even seen Falcon prevent tactics that are typically indicative of targeted attacks that leverage tools like PowerShell.
Being fast, simple, and effective is great, but if the solution doesn’t provide ways to easily handle alerts and triage events you only trade one problem for another.