How to Consume Threat Feeds

Introduction
As part of the CrowdStrike API, the “Custom IOC APIs” allows you to retrieve, upload, update, search, and delete custom Indicators of Compromise (IOCs) that you want CrowdStrike to identify.
With the ability to upload IOCs to the endpoints can automatically detect and prevent attacks identified by the indicators provided from a threat feed.
Prerequisites
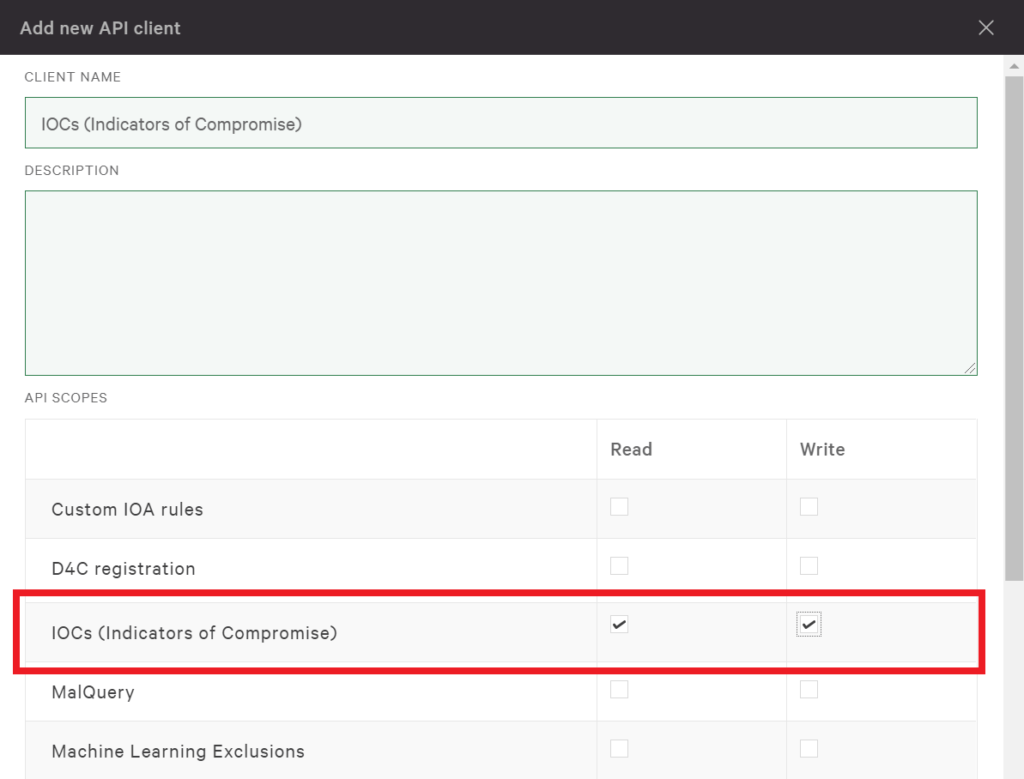
To get started with the CrowdStrike API, you’ll want to first define the API client and set its scope. Refer to this guide to getting access to the CrowdStrike API for setting up a new API client key. For the new API client, make sure the scope includes read and write access for IOCs (Indicators of Compromise).
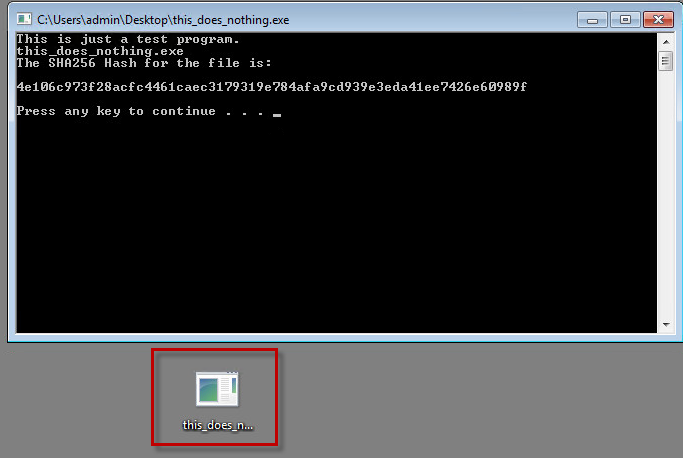
As example IOCs, we will be using the test domain “evil-domain.com” and the file “this_does_nothing.exe” (this_does_nothing.exe (zipped), Source Code (zipped), which has a sha256 hash value of 4e106c973f28acfc4461caec3179319e784afa9cd939e3eda41ee7426e60989f .
Beginning with the Crowdstrike API
CrowdStrike leverages Swagger to provide documentation, reference information, and a simple interface to try out the API.
Before accessing the Swagger UI, make sure that you’re already logged into the Falcon Console.
Here’s a link to CrowdStrike’s Swagger UI. Authorize with your Client ID and Client Secret that’s associated with the IOC scope as shown in the guide to getting access to the CrowdStrike API.
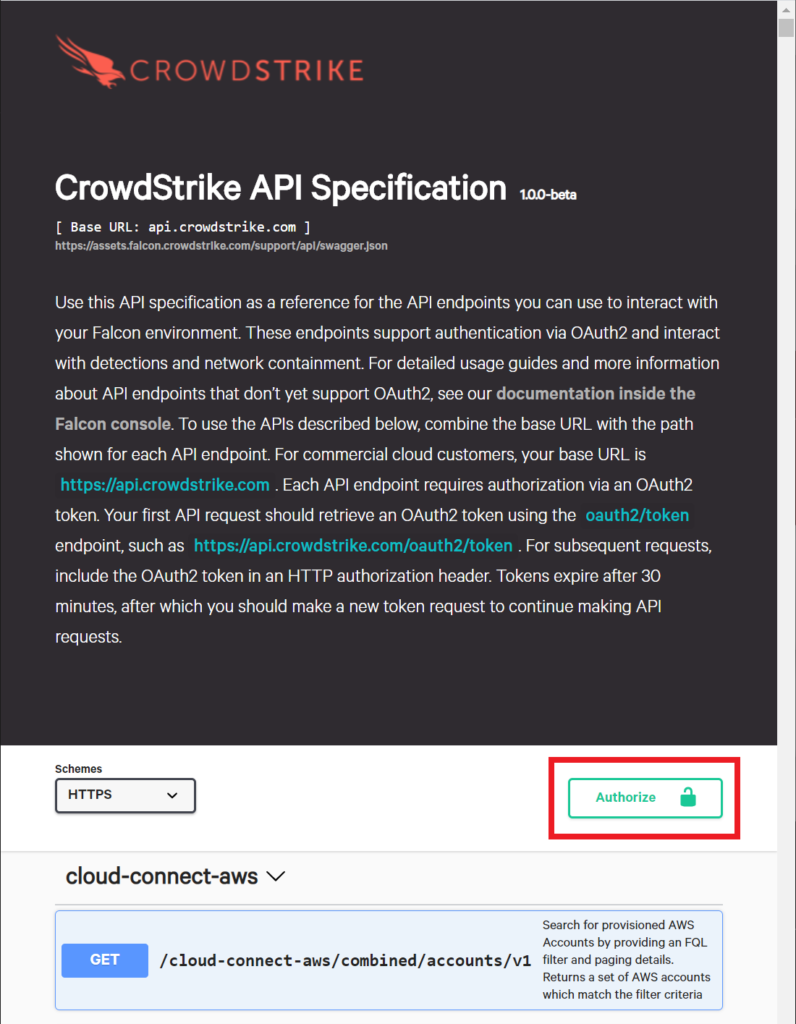
After you’re authorized, find the IOCs resource on the page. These are going to be the requests that we’ll demonstrate in this guide.
Creating an IOC
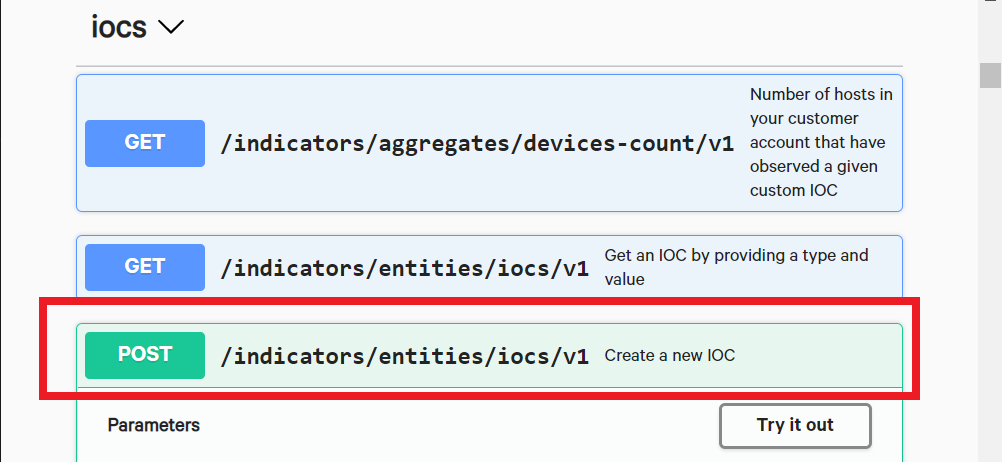
First, let’s create a couple of new IOCs. We will add an IOC for the domain “evil-domain.com” and the file hash “4e106c973f28acfc4461caec3179319e784afa9cd939e3eda41ee7426e60989f” from our sample file.
Click on POST /indicators/entities/iocs/v1 to expand it. This will provide you with descriptions of the parameters and how you can use them. It also shows sample responses below as well.
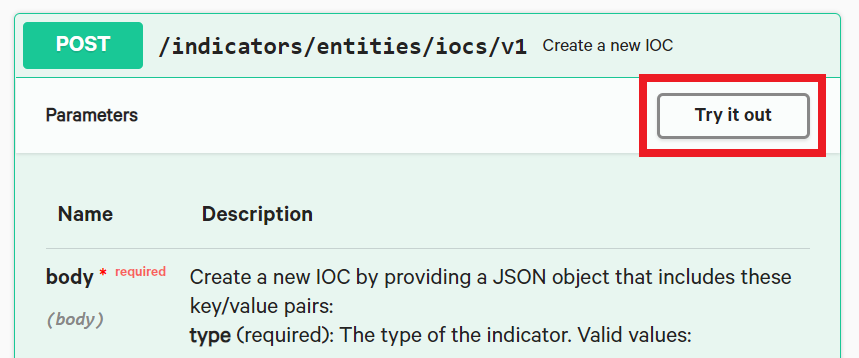
The information provided here is great at helping you understand how to issue the requests and is all very interesting, but we can actually take it to the next step by making a request directly from the interface with the “Try it out” button. This guides you on how to implement the CrowdStrike API and allows you to test requests directly while having the documentation readily available.
Click on “Try it out”.
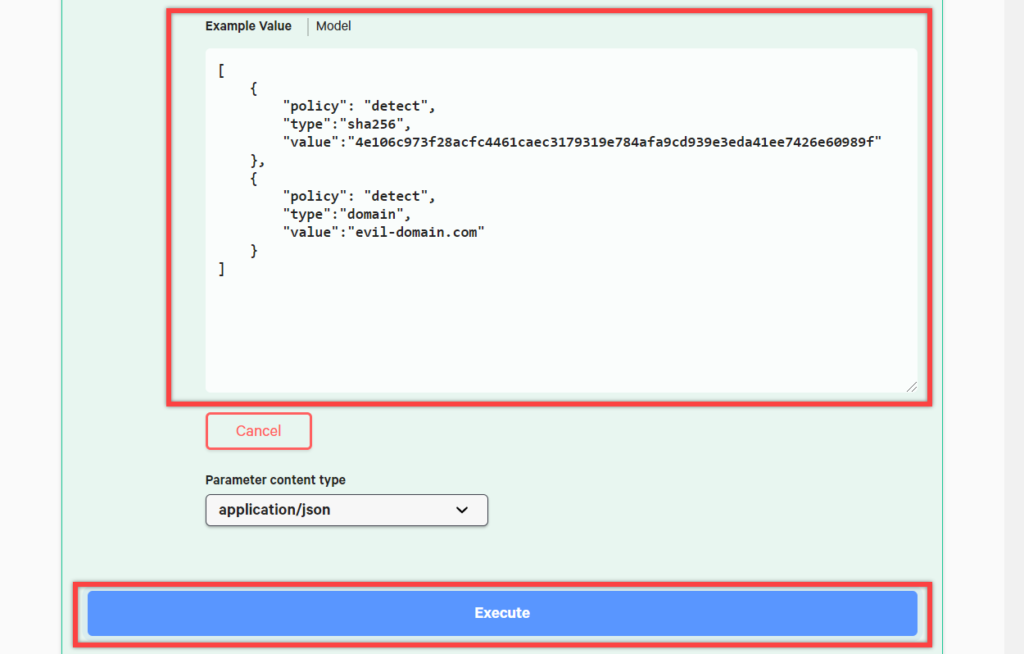
The “Try it out” button will make the Example Value box editable. It is prepopulated with placeholder values which we will replace in just a moment. We can see that even though there are several keys that we can modify, the only required ones are type, value, and policy. We’ll use the required keys for now and just enter the necessary values that we need to create the IOCs.
We can create an individual IOC or multiple IOCs in a single request, so we’re going to add both sample IOCs with our single request. You can edit your Example Values manually or just replace the existing contests with the following:
[
    {
        "policy": "detect",
        "type":"sha256",
        "value":"4e106c973f28acfc4461caec3179319e784afa9cd939e3eda41ee7426e60989f"
    },
    {
        "policy": "detect",
        "type":"domain",
        "value":"evil-domain.com"
    }
]
Hit the “Execute” button at the bottom and you can see your response body below.
If everything went as expected, you will receive a “200” under Code and no “errors” in the body of the response. If you receive a “401” error and see “access denied” in the body of the message, double check your authorization.
Note: The actual curl command will include authorization information that is not shown here.
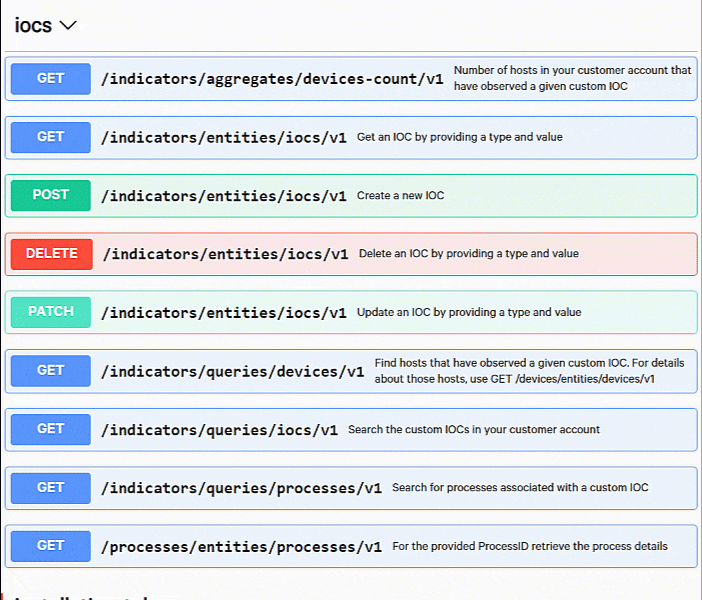
Listing IOCs
Now that we’ve created a few IOCs in the CrowdStrike Platform, let’s list them out. Click on GET /indicators/queries/iocs/v1 to expand it.
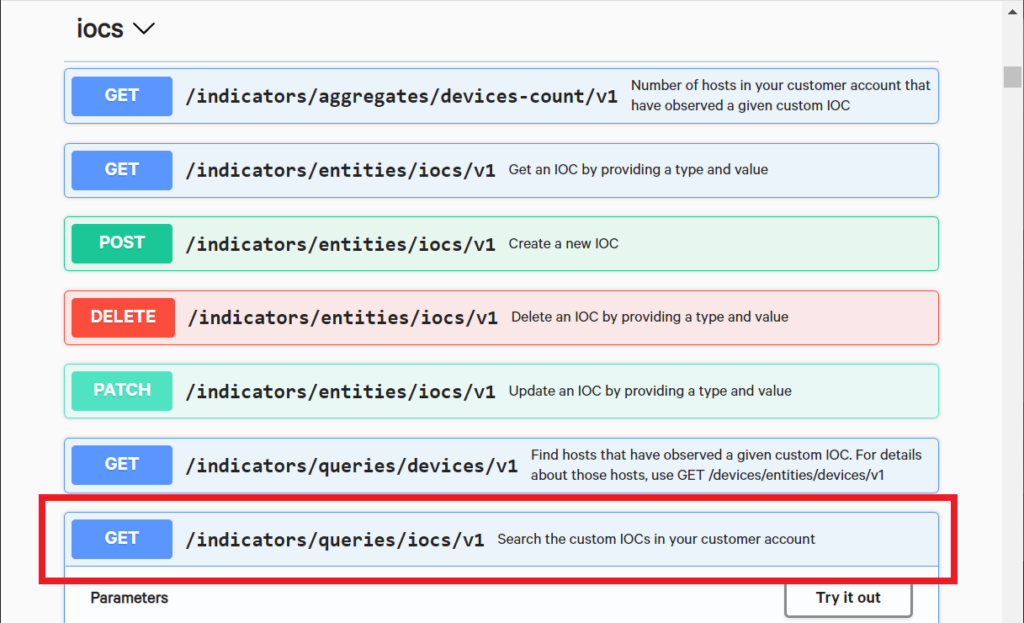
Again, it’ll provide you with a description of the available parameters and how to use them. Now, click on the “Try it out” button.
Something that you might notice right away is that instead of a single Example Value box, the IOC search resource provides a series of fields where you can enter values in directly.
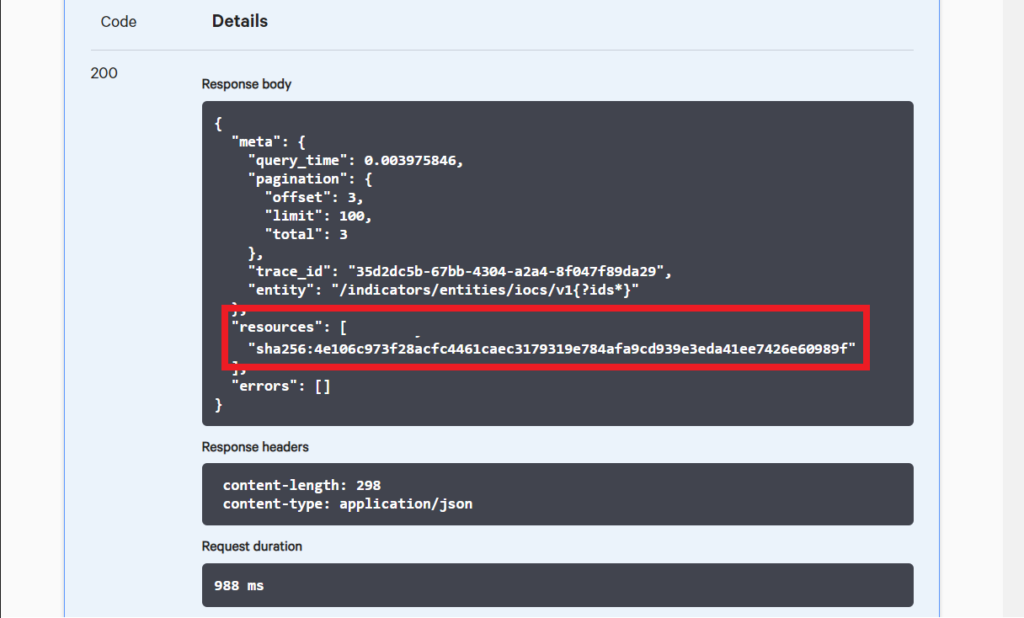
For example, you can enter “sha256” into the “types” box and then hit “Execute”.
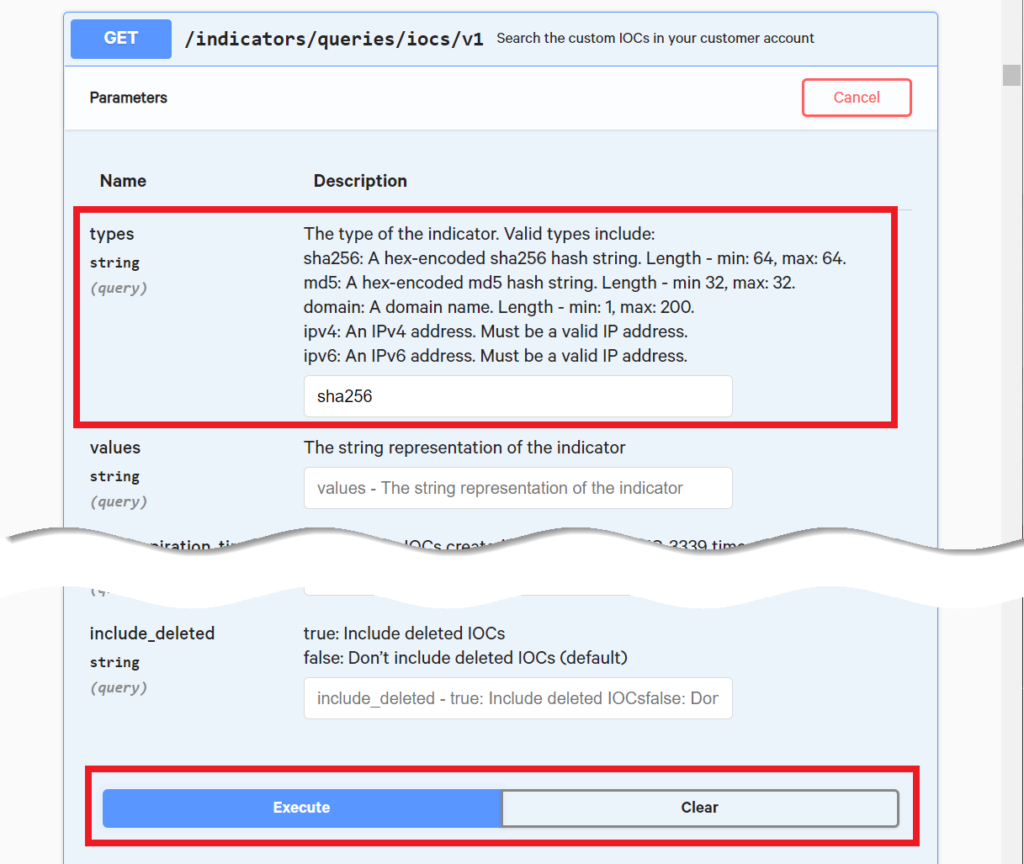
After we execute the request, it will pull up the sha256 hash of the IOC that we created earlier and list it in the details section below. CrowdStrike provides many other parameters that you can use to perform your searches. For example, you can narrow down your search to only IOCs created after a specified time or for specific hash values. Take a look at the other fields to see what else you can do.
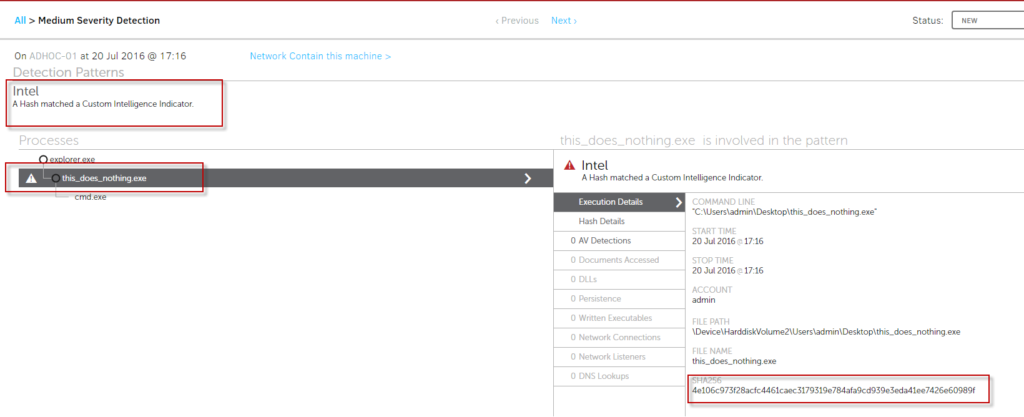
An example detection from an imported IOC
To demonstrate what a detection based on your custom IOC looks like, we will use a Windows machine with CrowdStrike Falcon® installed.
You can run our test tool “this_does_nothing.exe” (see beginning of article) and verify in the command window that opens, that the sha256 hash matches the IOC we uploaded.
Immediately after you execute the test tool, you will see a detection in the Falcon UI.
Deleting an IOC
So far, we’ve created a few IOCs and searched for them. Now, let’s use the Delete request to remove IOCs that we no longer want detected.
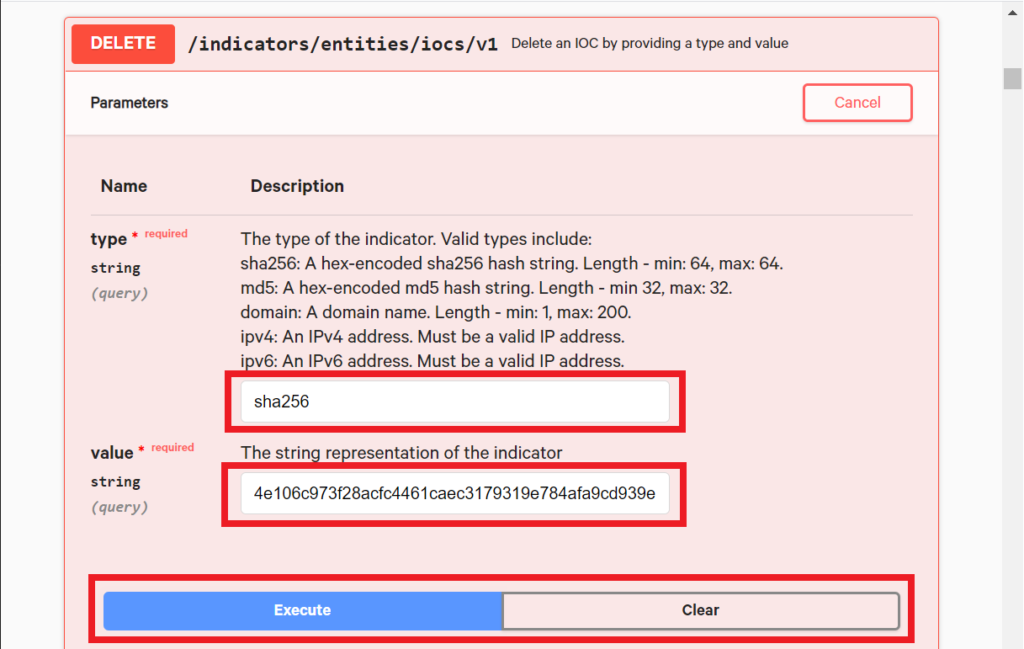
Click on DELETE /indicators/entities/iocs/v1 to expand it. Since deleting an IOC is a very straight forward process, there are only two parameters available here, just the type and value, both of which are required.
Click on the “Try it out” button.
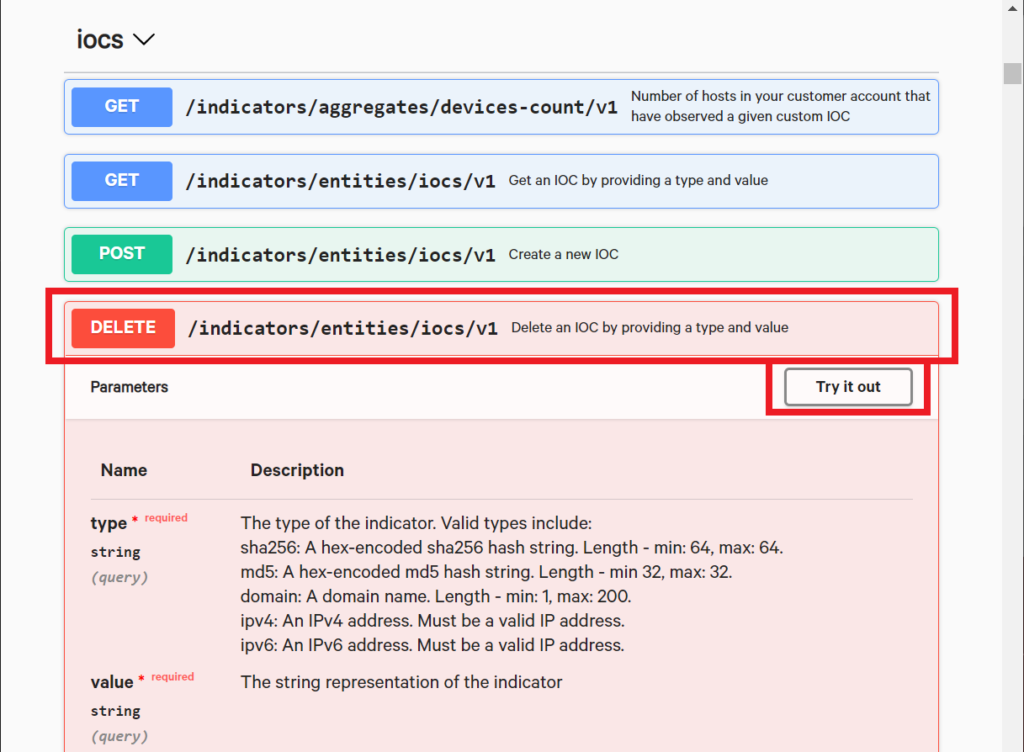
The Delete resource also provides fields that you can fill in. We’ll enter the same sha256 value where the type is “sha256” and the value is “4e106c973f28acfc4461caec3179319e784afa9cd939e3eda41ee7426e60989f”. Just enter those values into the fields and hit the “Execute” button.
Now let’s verify that we have deleted the file hash by executing the Search IOC request again.
Expand the GET /indicators/queries/iocs/v1 again and this time, let’s leave all the fields blank. Since none of the fields are required, this will search through all the IOCs in our CrowdStrike environment.
When we receive the response, we can see that the only IOC still listed is the domain.
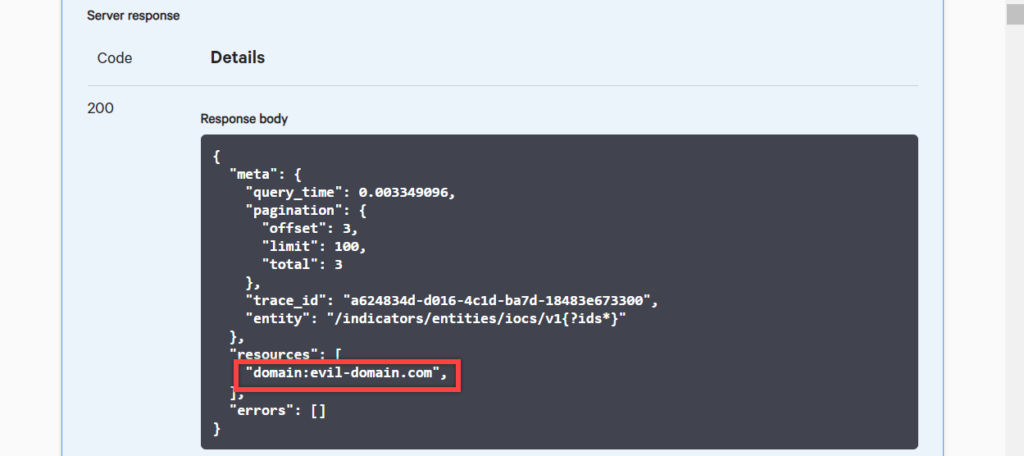
You can now delete the evil-domain.com with the delete request as well.
Conclusion
This guide is just the start of your journey with the CrowdStrike API. There is plenty of additional information in the CrowdStrike API Swagger UI, as well as in the Custom IOC APIs Documentation accessible through the Falcon console Docs menu.