Enrich Detections with Falcon Foundry Extension Builder

Falcon’s endpoint detections provide comprehensive information about potential cybersecurity threats. Using Falcon Foundry, you can enrich this information by leveraging detection data to display additional context that streamlines the investigation process and enhances threat hunting capabilities. This tutorial walks you through creating a Falcon Foundry app that enriches Falcon detections with third-party geolocation data.
The app integrates Abstract’s IP Geolocation API to provide location information about IP addresses associated with detections, displaying this data directly within the Next-Gen SIEM endpoint detection details page in the Falcon console.
This tutorial leverages Falcon Foundry’s new extension builder to create the UI using drag and drop components without requiring the Foundry CLI or manual code editing.
Prerequisites:
- Falcon Insight XDR or Falcon Prevent (one app)
- Falcon Next-Gen SIEM or Falcon Foundry (1+ apps depending on entitlement)
- Falcon Administrator and App Developer roles
Create a Falcon Foundry App
Log in to Falcon and go to Foundry > Home. Click Custom app and enter the following details:
- App name:
IP Geolocation Enrichment - Description:
Extends detection details with Abstract's IP Geolocation API - Logo (optional): Add an image of your choosing. I used this one from flaticon.com. You’ll need to resize to 160×160 before uploading.
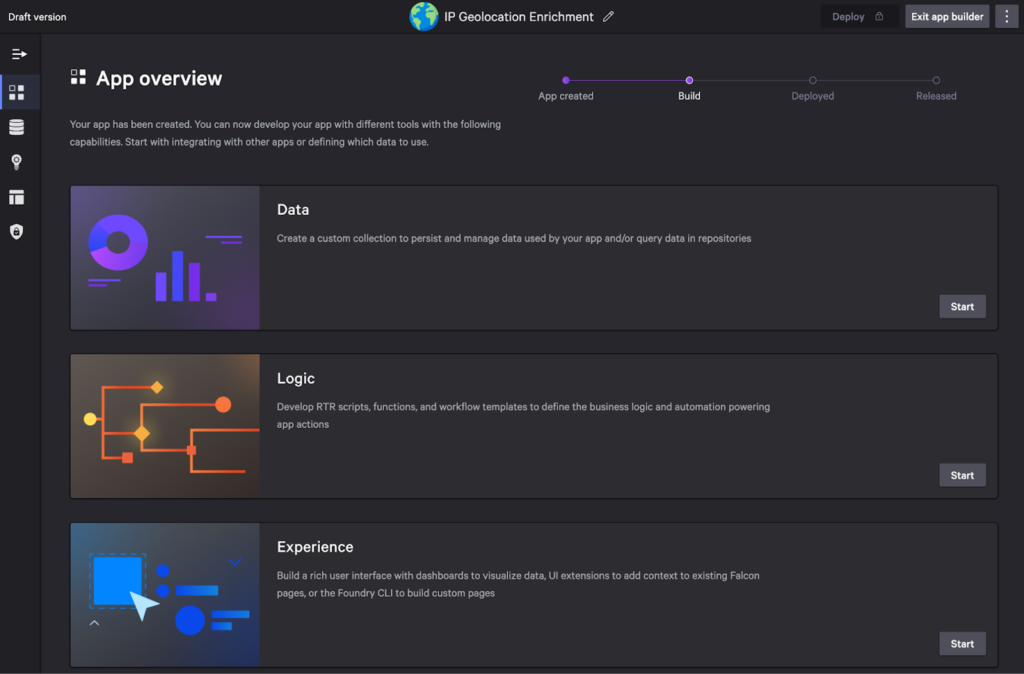
Click Create app to continue. You’ll land on the App overview screen where you can add features to your application. The interface is organized in three rows: data integrations, logic components, and UI elements.
Add an API Integration for Abstract
With an API integration, you define HTTP-based operations and then invoke these operations from your UI extension. You can import an OpenAPI specification or create operations manually. Since Abstract doesn’t have an OpenAPI spec for its IP Geolocation API, you’ll create one manually.
Sign up for a free account to Abstract’s API. I used my Google Account to sign in. In the Lookup section, click on IP Geolocation. You will see your API key. Copy this value to use later. You can also test this API by making a test request in your browser or copying and pasting the curl command into a terminal and executing it.
curl 'https://ipgeolocation.abstractapi.com/v1/?api_key={api-key}&ip_address={ip-address}'
Now you can use this information to create and test your API integration.
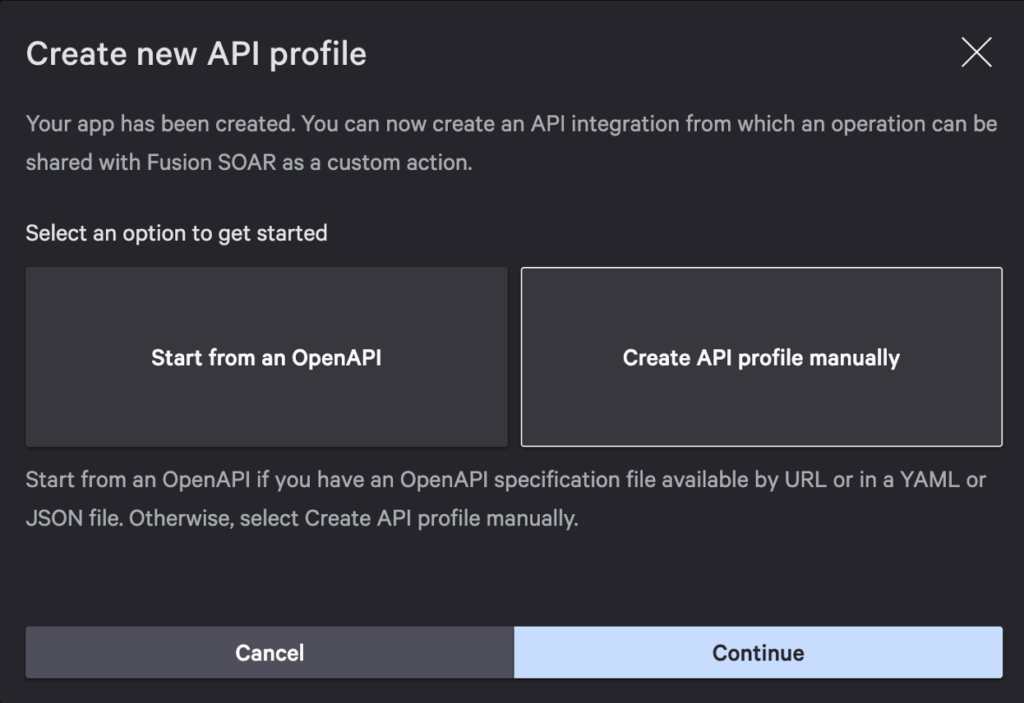
Click on the Start button in the Integrations tile, followed by Create an API integration. Select Create API profile manually and click Continue.
Use the following values to complete the API integration profile:
- API profile name:
Abstract Geolocation API - API profile description:
Abstract's IP Geolocation API is a fast, lightweight, modern, and RESTful JSON API that determines the location and other details of IP addresses from over 190 countries. - Host environment:
Cloud - Host protocol:
https - Host:
ipgeolocation.abstractapi.com - Auth type:
API key - API key parameter name:
api_key - API key parameter location:
query
Click Save API integration. On the next screen, click Create operation and specify the following values:
- Operation name:
Get IP Location - Description:
IP Geolocation Information - Method:
GET - Path:
/v1/
Click Next to continue. Select the Add query parameter button, use ip_address for the name, and click Save.
Test the Get IP Location Operation
Select Test from the left navigation menu and Create a temporary configuration to test. Name it Abstract API Key and paste in the value you copied earlier. Click Create Configuration.
To get your IP address, you can google “what’s my IP address” or go to https://api.ipify.org.
Copy the returned value into the params.query.ip_address input box and click Test operation. You should get an “Operation succeeded (200)” message with a response.
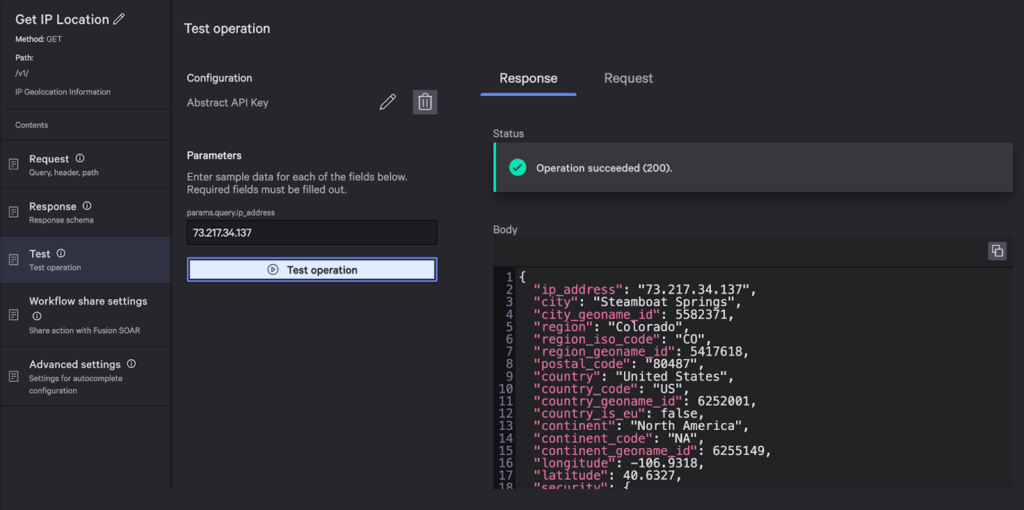
To make it possible to select individual fields from the response, copy the body using the two-boxes icon. Click Response and Create response code. Specify 200 for the code and click Save.

Now click Response body > Generate schema and paste in the JSON response you copied earlier. Click Generate and you’ll see the response body schema.
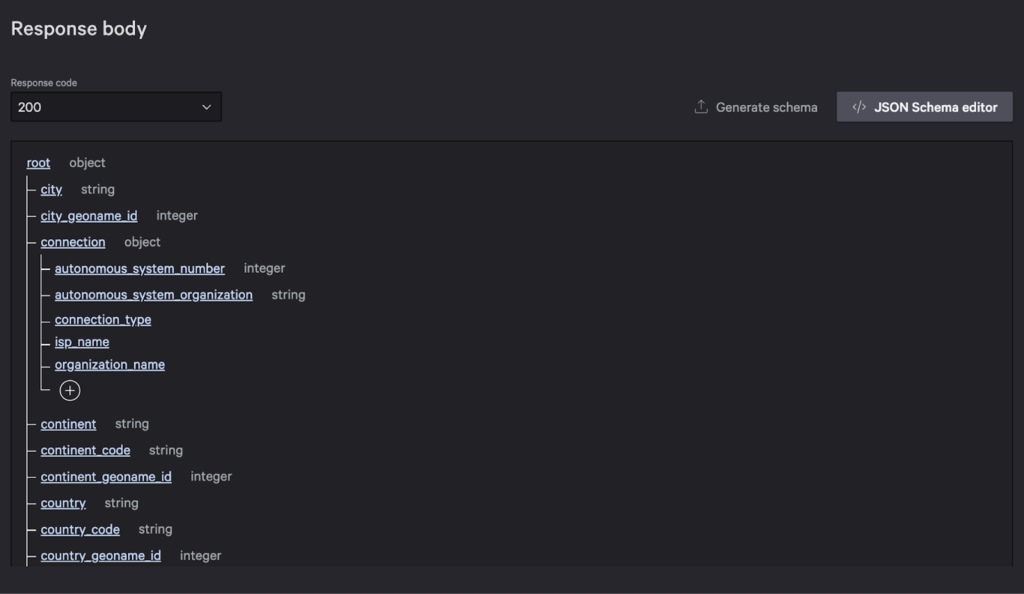
Click Done. The Abstract Geolocation API integration details page appears.
Deploy Your App
Deployment pushes a version of your app to the CrowdStrike cloud, providing version control and allowing you and others to iterate on your app. It’s a good idea to deploy your app whenever you add a new capability. Deployment makes your app visible to Falcon administrators and Falcon Foundry app developers. Your app isn’t visible to end users until you release and install it.
From the Abstract Geolocation API integration details page, click Deploy. In the Commit deployment dialog, select Major and enter Added API integration for the description. Click Deploy. The message “Deploying app” appears, followed by the message “App deployed successfully”.
Add a UI Extension to Your App
Now you can add a UI extension to embed geolocation data into the Falcon Next-Gen SIEM and Endpoint detection details in the Falcon console.
Go to Foundry > Home. Find your app under Recent apps and select Edit app from the three-dot menu. Scroll down to the Experience tile and click Start. On the Experience page, click Create an extension. In the Create an extension dialog, enter the following values:
- Name:
IP Address Enrichment - Description:
Adds Geolocation data to Next-Gen SIEM detection details - Extension location in Falcon:
Endpoint detection details
The last option makes it possible for a Falcon console user to view the details of a Falcon Next-Gen SIEM detection and your app data is displayed in this panel. Click Create to continue.
Display the IP Address Related to the Endpoint Detection
In this step, you’ll use Falcon’s contextual data (available in the endpoint detection details panel) to display the IP address related to the detection.
From the UI components tab of the extension builder, drag a Container component from the Containers list and drop it into the canvas.
Then, drag a Text component from the Controls list and drop it in the container. Click on the text component and modify its properties to be as follows:
- For Color, select
Titles and attributes. - For Font size, select
sm. - For Display text, enter
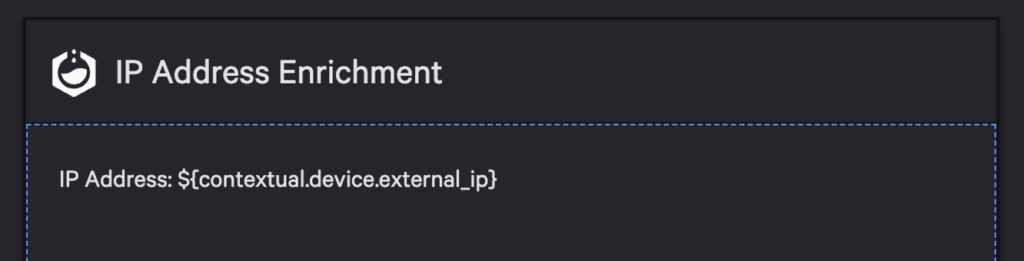
IP Address: and click Insert dynamic value.
In the resulting dialog, click the Data source dropdown and notice the two headings.
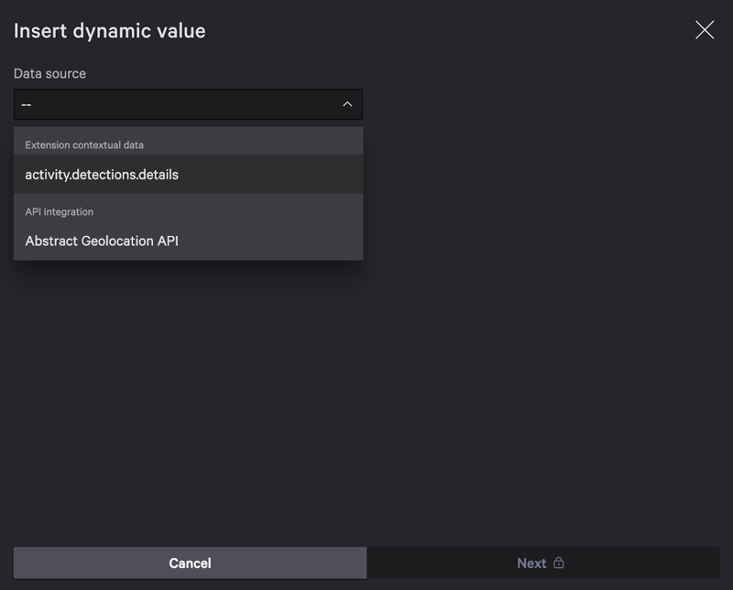
Extension contextual data provides access to the standardized object metadata available on the page you’re adding the extension to, in this case the detection metadata available for an endpoint detection.
API integration provides access to the data from the third-party API defined in the Falcon Foundry app, in this case Abstract.
Select activity.detections.details and click on the Variables dropdown. Search for “ip”, select Device, External_ip, and click Insert. Make sure there’s a space between the label and the variable, scroll up, and click Save. Your canvas should look as follows:
Display Geolocation Information for the IP Address
Create the UI to display geolocation information for the IP address associated with an endpoint detection.
Drag a Label value component from the Controls list and drop it onto the canvas. Make sure to drag it past the end of the IP address text control you added earlier.
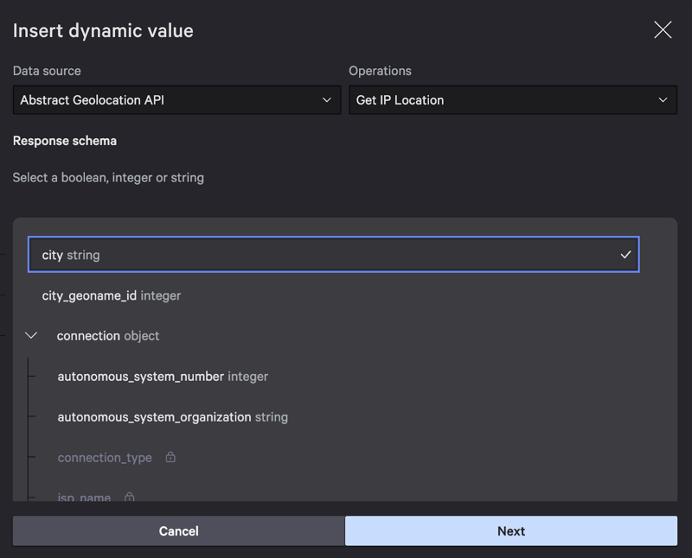
In the right panel, change the labels to be City, Country, and Timezone, respectively. Insert dynamic value for the City’s value, select Abstract Geolocation API and the Get IP Location operation.
Select City and click Next.
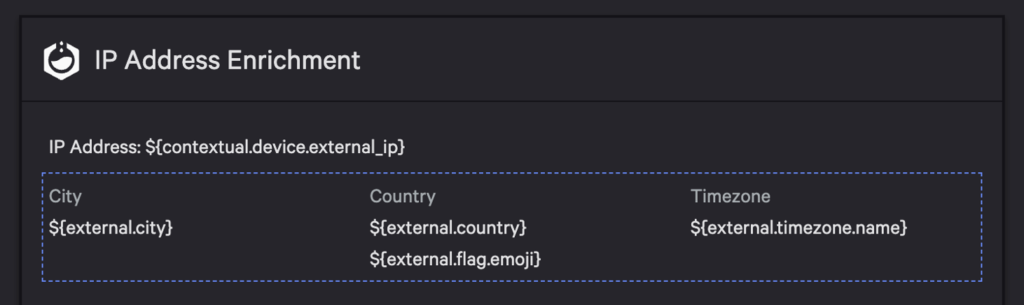
After choosing the API Operation and the attribute that you want to display, you will need to enter any request parameters as specified in the API Integration. In our example, you will need to provide the ip address as a query parameter as a query.ip_address value by entering ${contextual.device.external_ip}. Keep this value on your clipboard to use with the other dynamic values. Click Insert.
Repeat the process for Country and Timezone. You can see from the screenshot below that I included the country’s flag emoji next to the country value to spice things up a bit. Make sure to add a space between the dynamic values.
Click Save and click the Experience link to return the experience page.
Deploy, Release, and Install Your App
Now you need to redeploy, release, and install your app from the app catalog to pick up the UI extension you added:
- Deployment saves a new version of your app.
- Releasing your app makes it available for installation from the app catalog.
- Installation makes it available to end users. When you install an app, any experiences such as extensions or logic (workflows) become available to all users in your CID.
From the Experience page of the App builder, click Deploy. In the dialog, use the following values:
- Change type:
Major - Change log:
Add UI extension
Click Deploy. After viewing the success messages, click Release. Enter the values below:
- Change type:
Major - Release notes:
App with IP Geolocation API integration
Click Release. After success messages appear, click View in app catalog, followed by Install now.
Acknowledge the app permissions information by clicking Accept and continue.
On the next page, use Abstract API Key for the name and paste your Abstract API key in the API key field. Click outside the API key field to enable the Install app button, then click Install app.
As soon as you see a success message, your app is visible to all end users in the current CID. Your app’s status is now Installed, with a version of 1.0.0.
Test Your App
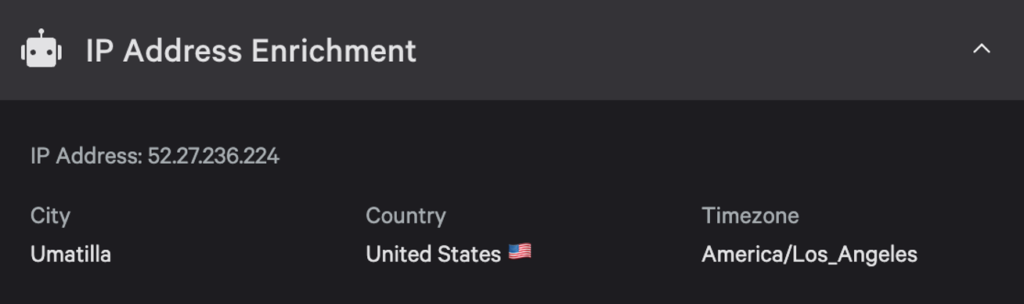
Test your app by verifying your UI extension is visible in the endpoint detection details panel.
Go to Next-Gen SIEM > Detections. Click a detection to see its details. Scroll to the IP Address Enrichment section, click the title to expand it, and you should see the IP address associated with the detection, with geolocation information for that IP address.
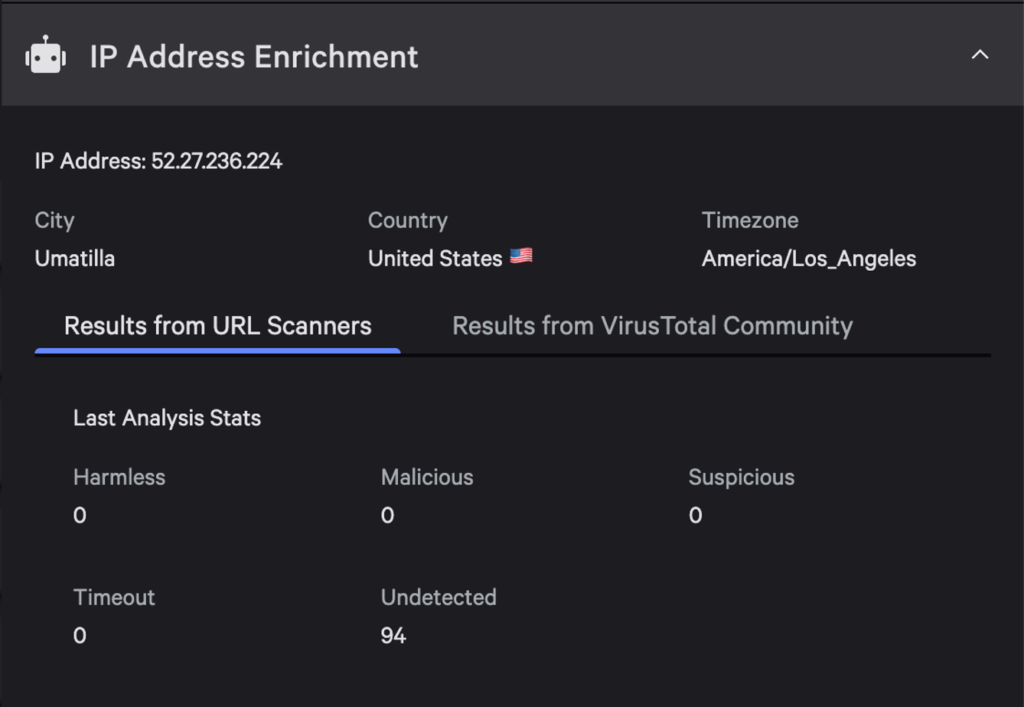
Enhance Your App with VirusTotal
For additional context, consider extending your app with VirusTotal integration. You can follow the tutorial Create a Detection Enrichment App with Foundry Extension Builder in the Falcon documentation.
Foundry supports multiple API integrations in a single app, allowing you to add a tabbed interface with both geolocation and VirusTotal threat intelligence for IP addresses.
Learn More About Falcon Foundry
I hope you’ve enjoyed learning how to build UI extensions with Falcon Foundry’s extension builder. For questions or issues, visit our Foundry Developer Community.
You might also find the r/crowdstrike community on Reddit helpful. For more resources, check out Foundry > Learn for tutorials, getting started guides, and detailed documentation of application capabilities.